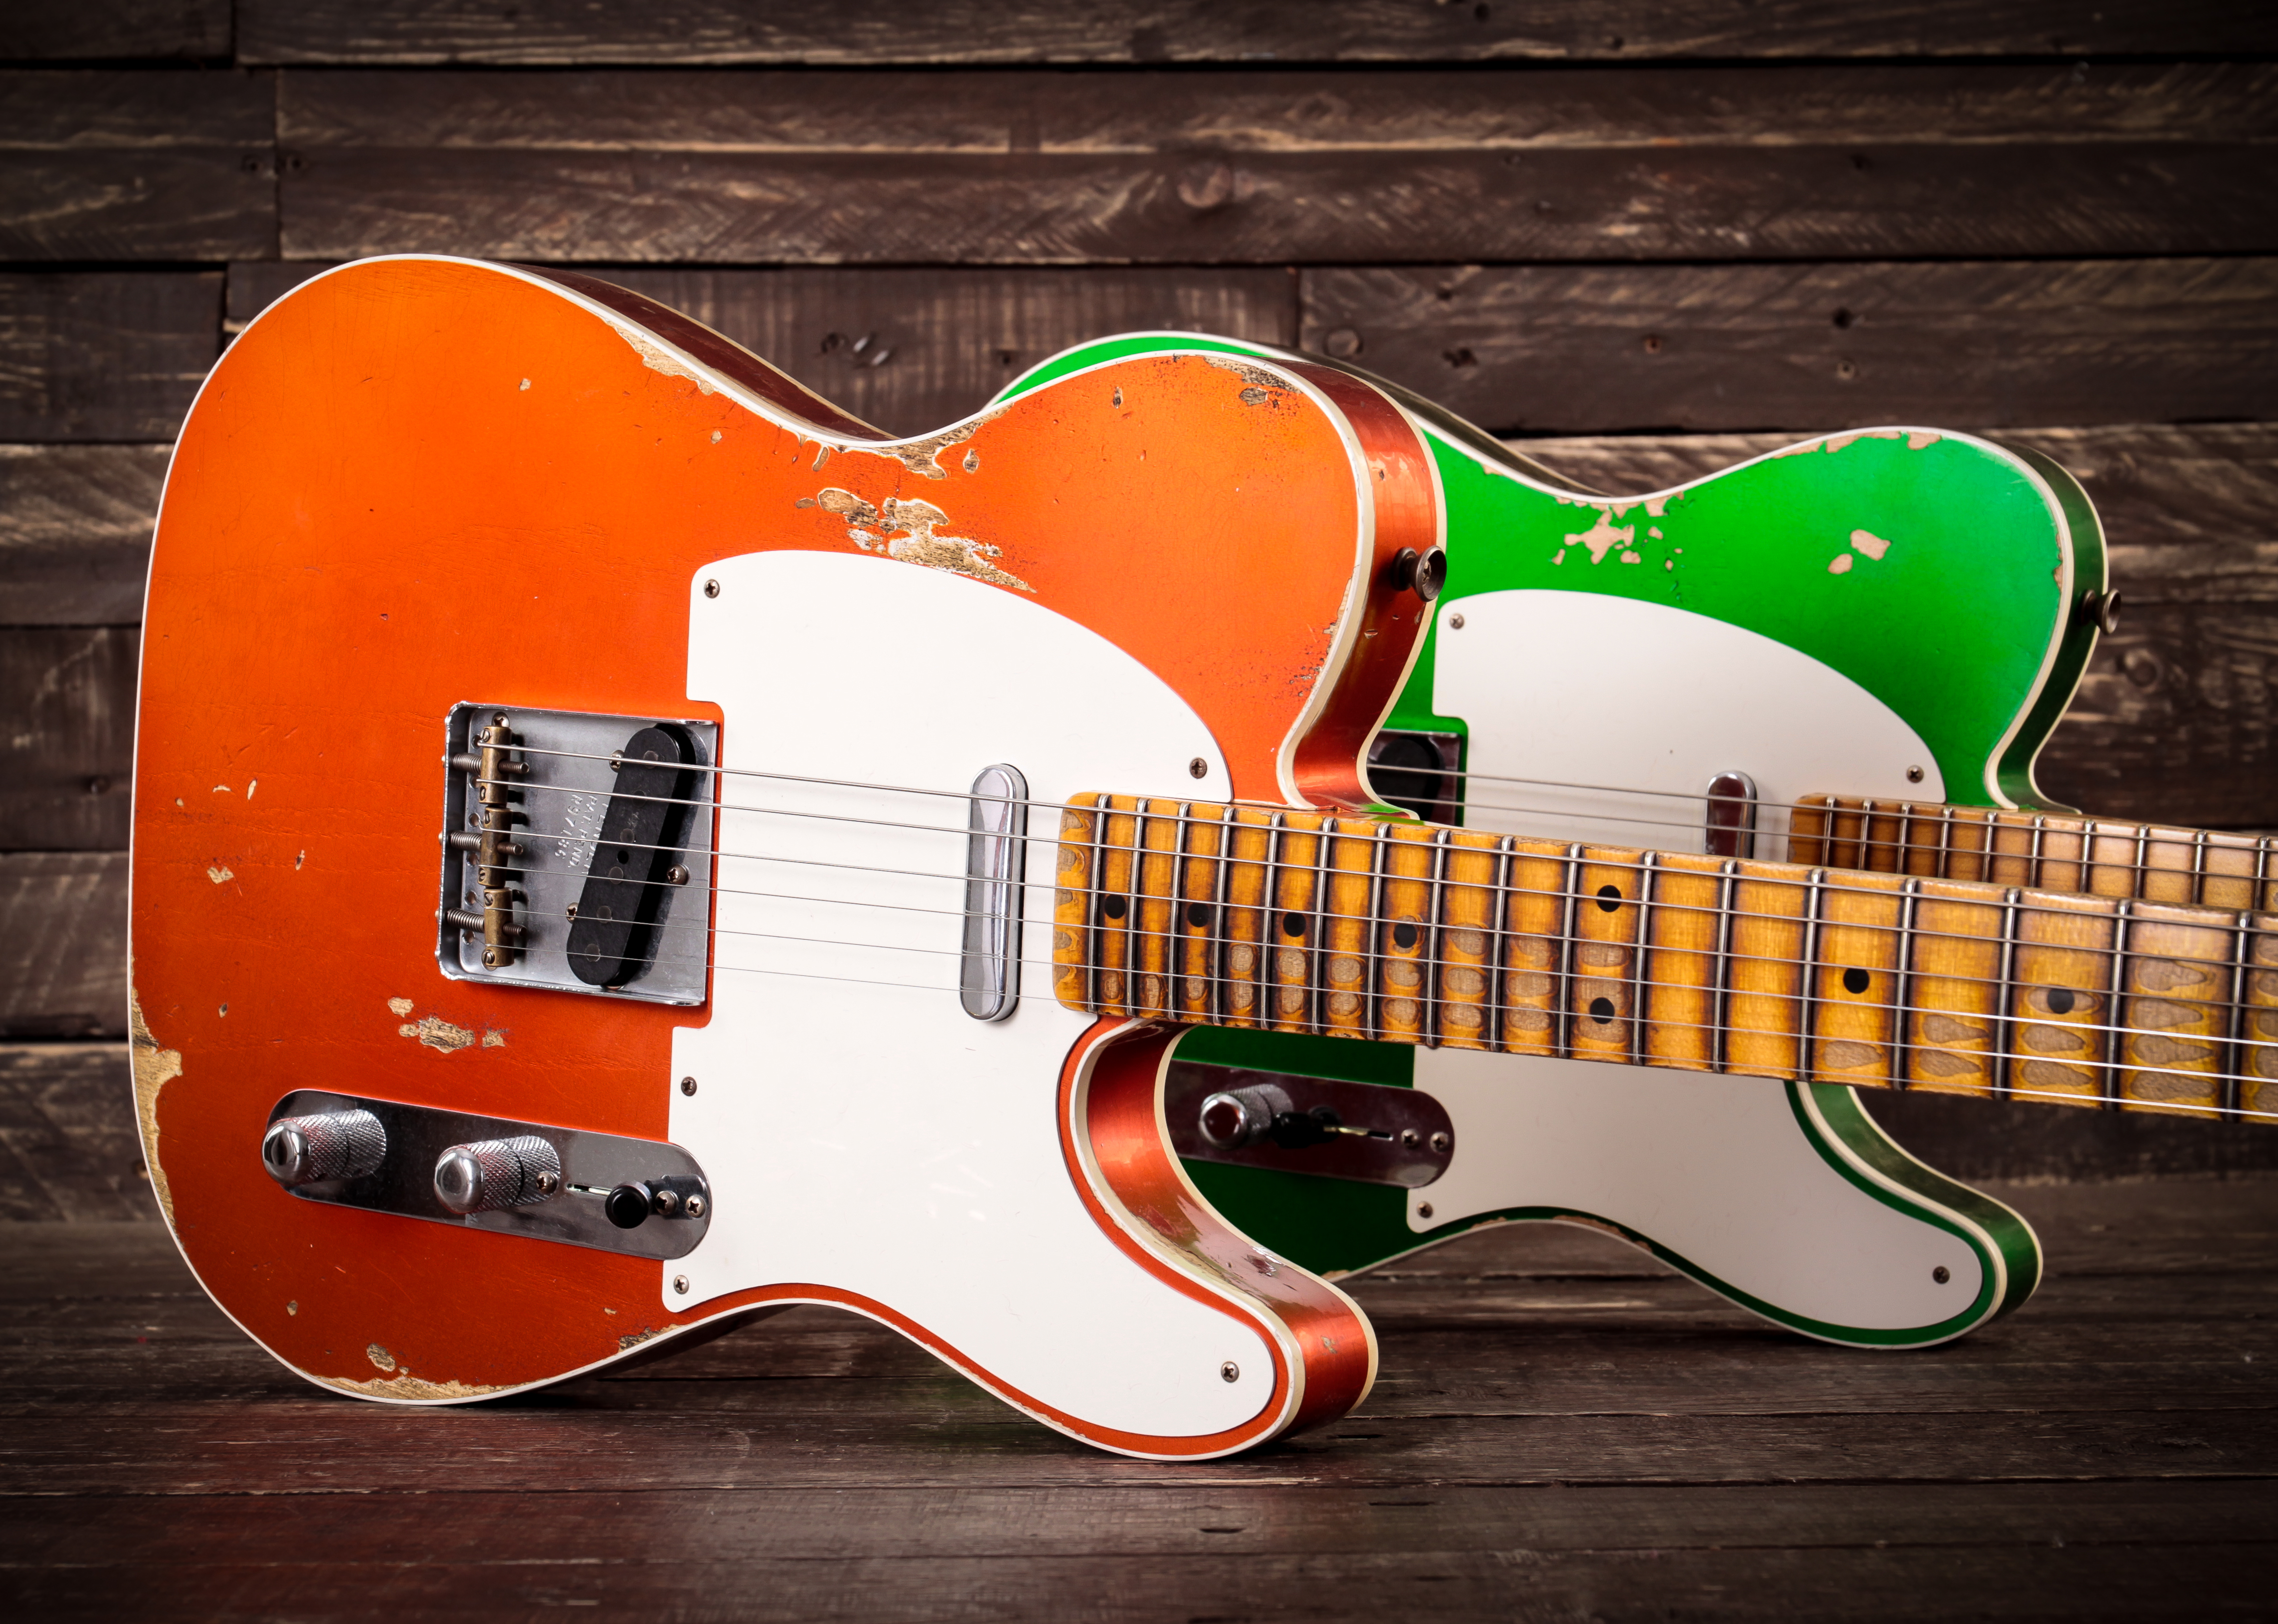
In the hallowed halls of guitar mastery, there lies a secret art that only the most dedicated shredders dare to explore: the mystical realm of reliquing. But fear not, brave guitar warriors, for I am here to guide you through the treacherous terrain of distressing, relicing, and beating the ever-loving hell out of your axe until it looks like it’s been through a rock ‘n roll war. So grab your soldering iron, dial up the distortion, and prepare to dive headfirst into the wild world of mastering guitar relicing techniques. It’s gonna be a journey, my friends, but trust me - the end result is gonna be so damn cool, you’ll wonder why you ever bought a brand new guitar in the first place.
Contents
- 1 Understanding the Fundamentals of Guitar Relicing
- 2 Exploring Various Techniques for Aging Wood
- 3 The Art of Simulating Wear and Tear on Guitar Hardware
- 4 Creating Authentic-Looking Scratches and Dings
- 5 Techniques for Aging Plastic Parts and Pickguards
- 6 Mastering the Application of Faux Finishes for a Vintage Look
- 7 Maintaining the Playability and Sound Quality during the Relicing Process
- 8 FAQs
- 9 Time to Rock On!
Understanding the Fundamentals of Guitar Relicing
So you want to dive into the world of guitar relicing, huh? Well, buckle up because you’re in for a wild ride! Let’s break down the fundamentals of this art form that will have you transforming your shiny new guitar into a vintage beauty in no time.
First things first, you need to understand that relicing is all about creating a worn, aged look on your guitar to give it that “old soul” vibe. Here are some key concepts to keep in mind:
- Patience is key: Relicing a guitar is a labor of love, so be prepared to invest some serious time and effort into the process. Rushing through it will only result in a half-baked relic job.
- Embrace imperfections: Don’t be afraid to make mistakes or let things get a little messy. Those scratches, dents, and blemishes are what give your guitar its character.
- Experimentation is your friend: There are no hard and fast rules when it comes to relicing, so feel free to get creative and try out different techniques to achieve the look you’re going for.
Whether you’re aiming for a subtly aged patina or a heavily reliced masterpiece, the key is to have fun with the process and let your creativity run wild. So grab your tools, roll up your sleeves, and get ready to give your guitar a makeover like no other!

Exploring Various Techniques for Aging Wood
So, you’ve got a piece of wood that you want to give a vintage, aged look to? Well, you’re in luck because there are a myriad of ways to achieve that weathered, rustic appearance! Here are some quirky and creative techniques you can try:
1. Vinegar and Steel Wool: This sounds like the beginning of a magic potion recipe, but trust me, it works wonders on wood. Simply combine vinegar with steel wool in a jar and let it sit for a few days. Then, brush the liquid onto your wood and watch it transform before your very eyes!
2. Baking Soda and Water: Who knew that a kitchen staple could help age wood? Mix baking soda with water to create a paste, then spread it onto your wood and let it dry. Voila! Your wood will look like it’s been sitting outside for decades.
3. Tea Stain: No, I’m not suggesting you throw a tea party for your wood (although that would be entertaining). Brew a strong black tea, let it cool, then brush it onto your wood. The tannins in the tea will darken the wood and give it a lovely aged patina.

The Art of Simulating Wear and Tear on Guitar Hardware
Have you ever wanted to give your shiny new guitar a bit of character? Fear not, for there is an art to simulating wear and tear on guitar hardware that can make your instrument look like it’s been on the road for years!
Here are some tips and tricks to achieve that coveted vintage look:
- Use sandpaper: Lightly sand the edges of your guitar’s hardware to create the appearance of natural wear and tear from years of playing.
- Add rust effects: Apply a small amount of rust effect solution to your hardware to mimic the look of aged metal.
- Weathering: Expose your hardware to the elements or use a patina solution to give it that weathered look.
Remember, the key to successfully simulating wear and tear on your guitar hardware is to be subtle and take your time. A little goes a long way when it comes to achieving that authentic vintage vibe!
Creating Authentic-Looking Scratches and Dings
Whether you’re a cosplayer looking to add some battle scars to your armor or a DIY enthusiast wanting to distress a piece of furniture, is a fun and easy way to achieve that worn and weathered look. Here are some tips to help you master the art of creating realistic wear and tear:
- Start with the right tools: Grab some sandpaper, a hammer, nails, screws, and even a chainsaw if you’re feeling adventurous.
- Think like a warrior: Imagine the history behind each scratch and ding. Was it from a fierce battle with a dragon or simply from years of wear and tear?
- Get creative: Don’t be afraid to experiment with different techniques to achieve the perfect distressed look. Try using a wire brush for a more textured finish or dabbing on some black paint for depth.
Remember, the key to is to let your imagination run wild and have fun with the process. So grab your tools, unleash your inner warrior, and get ready to add some battle scars to your next project!

Techniques for Aging Plastic Parts and Pickguards
Ever wish your brand new plastic parts and pickguards had that vintage, well-loved look straight out of the box? Well, you’re in luck! With a few simple techniques, you can give your new gear that perfectly aged patina without waiting decades for it to naturally occur. Here are some fun and easy ways to achieve that aged aesthetic:
First up, we have the **coffee staining** method. Simply brew a strong cup of coffee (or two) and let it cool to room temperature. Then, using a clean cloth, soak it in the coffee and gently rub it on the plastic parts and pickguards. This will give them a nice, subtle stain that mimics years of use and exposure to the elements.
Another popular technique is **heat distressing**. Be warned, this one can get a little smelly! Use a heat gun or hair dryer on a low setting to gently warm up the plastic parts. Be sure to move the heat source around to avoid melting or warping. This will create a slightly warped, aged look that is sure to turn heads at your next gig.
For those looking for a more hands-on approach, **sandpaper distressing** might be right up your alley. Grab some fine grit sandpaper and lightly sand the edges and high-traffic areas of your plastic parts and pickguards. This will create wear patterns that mimic years of playing and handling, giving your gear that perfect vintage vibe.
Mastering the Application of Faux Finishes for a Vintage Look
So you want to add that vintage flair to your home with some faux finishes, huh? Well, buckle up, because we’re about to take you on a wild ride through the world of paint and creativity!
First things first, when it comes to mastering faux finishes, you’ve got to have the right tools. **Think of yourself as a painter, but with a twist of whimsy and a sprinkle of magic**. Make sure you have brushes, sponges, and maybe even some feather dusters on hand to achieve that perfect aged look.
Next up, experimentation is key. **Don’t be afraid to get a little messy and try out different techniques**. Whether it’s rag rolling, stippling, or sponging, there are endless possibilities to create that vintage vibe you’re looking for.
And remember, practice makes perfect. **Don’t expect to become a faux finishing pro overnight**. Take your time, play around with different colors and textures, and before you know it, you’ll have that beautiful vintage look adorning your walls.
Maintaining the Playability and Sound Quality during the Relicing Process
When it comes to reliquing your guitar, it’s important to ensure that you maintain both the playability and sound quality throughout the process. After all, what’s the point of having a badass-looking guitar if it doesn’t sound or play great?
To achieve this balance, consider the following tips:
- Protect the fretboard: Cover the fretboard with masking tape or a protective film to prevent any damage while aging the body of the guitar.
- Use high-quality materials: When distressing the finish, be sure to use quality tools and products to avoid compromising the sound quality of the instrument.
Remember, the goal of reliquing is to enhance the appearance of the guitar while maintaining its functionality. So, take your time, pay attention to detail, and don’t be afraid to experiment with different techniques to achieve the desired look without sacrificing playability or sound quality!
FAQs
Why should I distress my guitar?
Because a shiny new guitar is so mainstream. Relicing your guitar gives it character and makes it look like it’s been through some tough gigs, even if it’s spent most of its time in your bedroom.
What tools do I need for guitar reliquing?
You’ll need sandpaper, steel wool, a screwdriver, a hammer, and your best “I-don’t-care-about-consequences” attitude.
How do I relic my guitar without damaging it?
It’s like cooking a steak – Low heat, slow process, and a little seasoning. Start with gentle sanding and slowly work your way up to more aggressive techniques. And always remember, you can’t undo a smashed guitar. Well, technically you can, but it won’t sound good.
Can I relic my guitar if it’s already old?
Sure, why not? Just because your guitar already looks like it’s been around the block doesn’t mean you can’t add a few more scratches and dents. It’s like giving an old car a new paint job – but in reverse.
How can I make my guitar look authentically reliced?
Play it hard, throw it around (just kidding, don’t do that), and maybe spill a drink on it. Basically, treat it like your ex treated your heart – with complete disregard for its well-being.
Time to Rock On!
Congratulations, you are now a master of guitar relicing techniques! You have transformed your once pristine instrument into a badass, vintage-looking rock machine. Now go out there and jam like never before, and remember – the more scratches, dents, and wear on your guitar, the better it sounds! Keep on rocking!


