

Guitar Pick Keeps Slipping”>Strumming your way to guitar greatness can be a bit of a tricky task, especially when it comes to wrestling with the enigmatic beast known as guitar action. But fear not, fellow rockstars! In this article, we will embark on a quest to unravel the mysteries of guitar action tuning and achieve the ultimate goal of perfecting playability. So grab your trusty guitar tuner and a sense of humor, because we’re about to dive headfirst into the wacky world of stringed instrument sorcery. Action and Its Significance”>
Contents
- 1 Understanding Guitar Action and Its Significance
- 2 Evaluating Your Guitar’s Current Action: The First Step
- 3 Tools of the Trade: Essential Gear for Action Adjustment
- 4 The Step-by-Step Process of Lowering Action for Enhanced Playability
- 5 Navigating the Challenges of Neck Relief and Truss Rod Adjustments
- 6 Neck Relief and Truss Rod Adjustments: Tackling the Trials and Tribulations
- 7 Critical Tips for Achieving Optimal String Height and Tension
- 8 Maintaining Your Guitar’s Action: Long-Term Strategies for Consistent Performance
- 9 FAQs
- 10 Strum on and Play on!
Understanding Guitar Action and Its Significance
Have you ever wondered why your fingers hurt after playing the guitar for hours on end? It’s not just because you’re a rockstar in the making (although that might be part of it). The height of your guitar’s strings, also known as the action, plays a significant role in how easy or difficult it is to play.
Think of it this way: high action means the strings are further away from the fretboard, making it harder to press down on them. On the other hand, low action means the strings are closer to the fretboard, making it easier to play. So if your fingers feel like they’re about to fall off after a jam session, it might be time to adjust your guitar’s action.
But why does guitar action even matter? Well, aside from preventing your fingers from turning into mush, the action also affects the overall playability and sound of your guitar. Here are a few reasons why understanding and adjusting your guitar’s action is crucial:
- Comfort: Lower action makes it easier to play, allowing you to fret notes and chords with less effort.
- Tone: The height of your strings can impact the tone of your guitar, so finding the right action for your playing style is essential.
- Intonation: Proper action ensures that each note rings out clearly and in tune, giving you that sweet, harmonious sound you’re looking for.
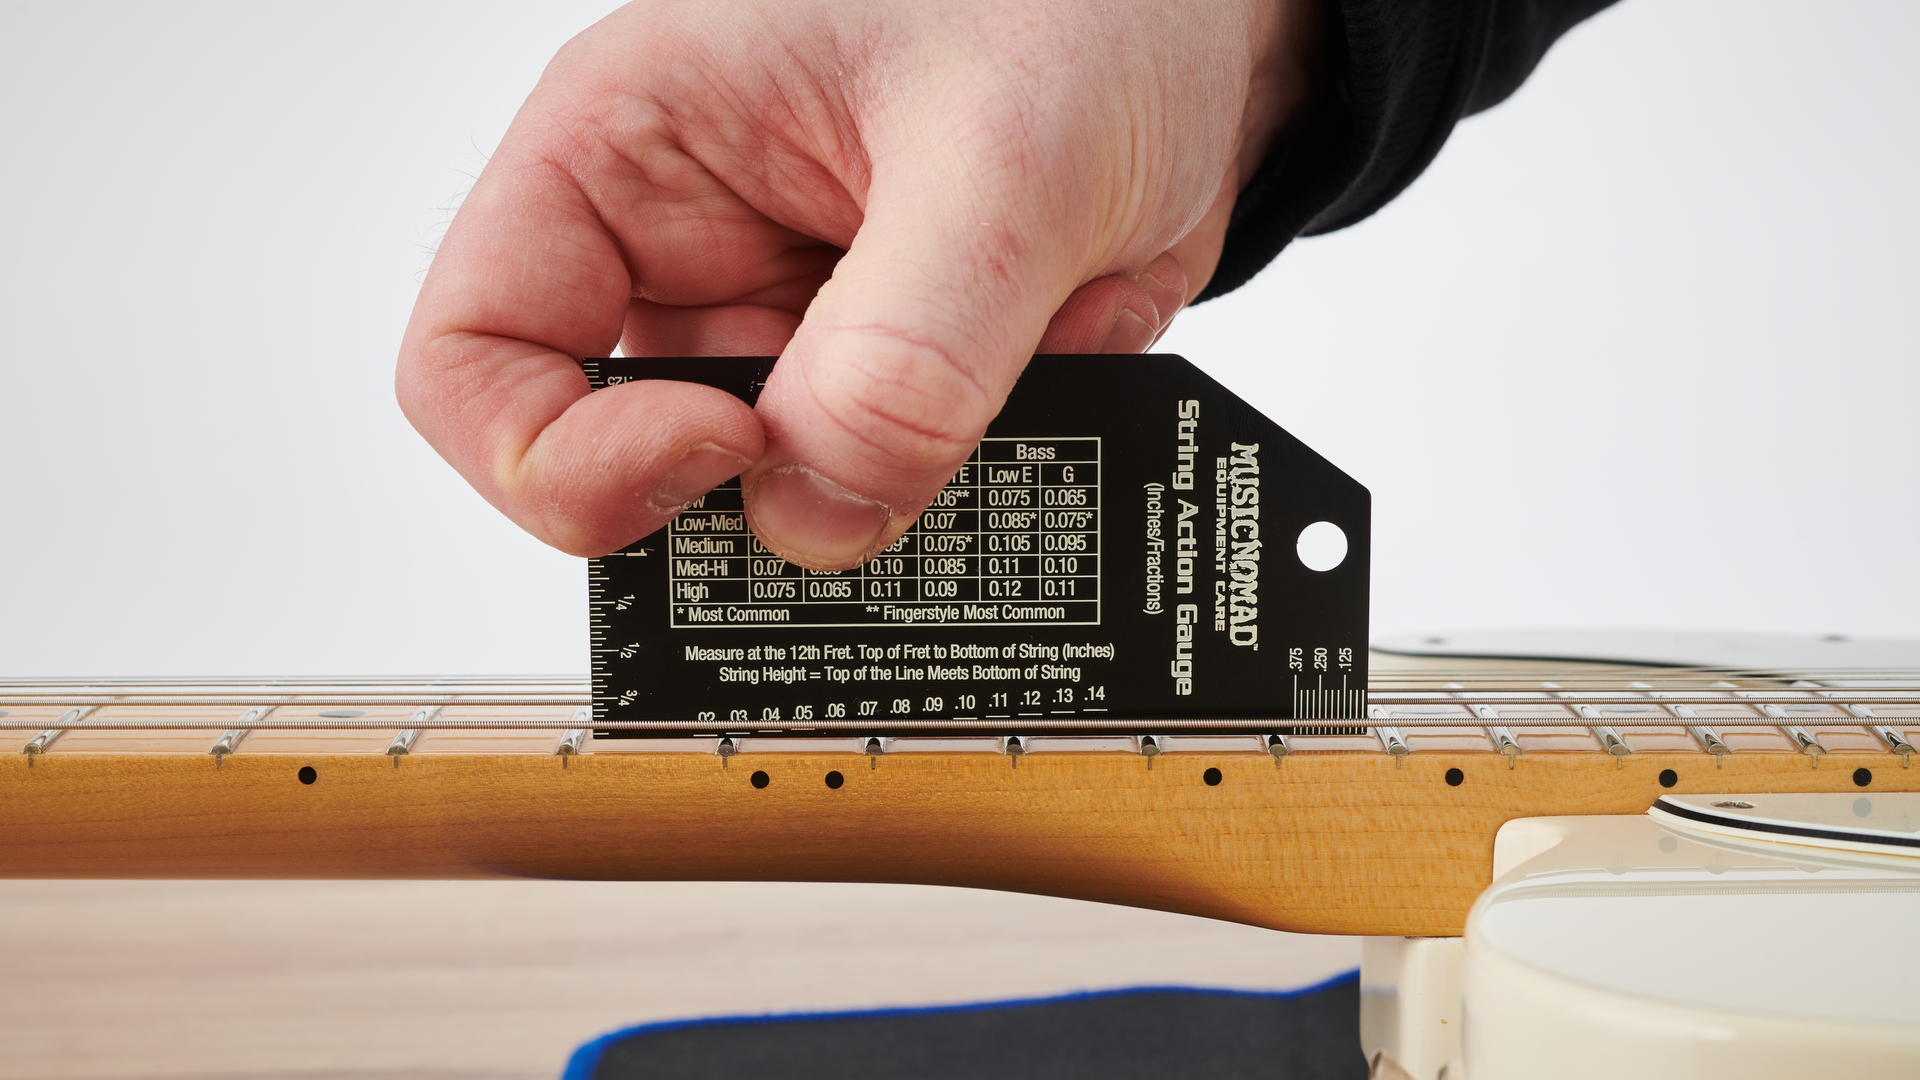
Evaluating Your Guitar’s Current Action: The First Step
Congratulations, future guitar hero! You’ve picked up your trusty six-string companion (or is it seven-string? eight-string?) and are ready to conquer the world with your killer riffs and melodious tunes. But hold up, before you unleash your inner rock god, it’s important to make sure your guitar is in top shape, starting with evaluating its current action.
So, what exactly is action, you ask? No, it’s not the latest blockbuster movie starring Tom Cruise. Action refers to the distance between the strings of your guitar and the fretboard. A low action means the strings are closer to the frets, making it easier to play, while a high action means your fingers will be getting quite the workout.
Now, grab your guitar (gently, please) and get ready to assess its current action like a seasoned pro. Here are a few key things to keep in mind:
String height: Use a ruler to measure the distance between the strings and the 12th fret. Is it as high as Mount Everest or as low as a limbo stick? A good action typically falls between 1.5-2 mm for electric guitars and 2-2.5 mm for acoustic guitars.Fret buzz: Play each string at every fret and listen for any buzzing or mute notes. A little buzz is normal, but excessive buzzing could indicate a too-low action.Comfort level: How does it feel when you play chords or solo? If your fingers are getting a serious workout, your action might be too high. If it feels like playing butter, you’re on the right track!
Tools of the Trade: Essential Gear for Action Adjustment
So you wanna be a master of action adjustment, huh? Well, you’re going to need some killer gear to make it happen. Let’s dive into the essential tools of the trade that will have you fine-tuning like a pro in no time!
First up, you’ll need a trusty set of precision screwdrivers. These bad boys are the key to getting into those tight spaces and making those delicate adjustments. And hey, they’re also great for fixing your glasses or tightening up that loose cabinet handle in the kitchen. Talk about versatile!
Next on the list is a quality multitool. You never know what kind of situation you’ll find yourself in when you’re out in the field making adjustments. Whether you need a pair of pliers, a knife, or even a bottle opener (hey, we all need to hydrate), a multitool has got you covered.
And let’s not forget about the flashlight. Sure, you might think you have a good eye for detail, but sometimes you need a little extra illumination to really see what’s going on. Plus, it’s a great way to scare away any critters that might be lurking in the shadows while you work your magic.
 Playability“>
The Step-by-Step Process of Lowering Action for Enhanced Playability
Alright, folks, it’s time to dive into the nitty-gritty details of lowering action on your guitar for that perfect playability! So, grab your tools and let’s get started!
First things first, loosen those strings so you can access the truss rod. Don’t worry, it’s not as scary as it sounds – just give it a little twist to adjust the neck relief to your liking. Remember, a little goes a long way, so take it slow and steady.
Next up, it’s time to tackle the saddle height. Grab your trusty screwdriver and adjust those bad boys to get the perfect string height. And hey, if you’re feeling adventurous, why not give your frets a good polish while you’re at it? Nothing like a shiny fretboard to make you feel like a rockstar!
And voila! With a little elbow grease and a lot of love, your guitar is now ready to rock and roll with that perfect, buttery-smooth action. So go ahead, strum those strings and marvel at your handiwork. You did it, champ!
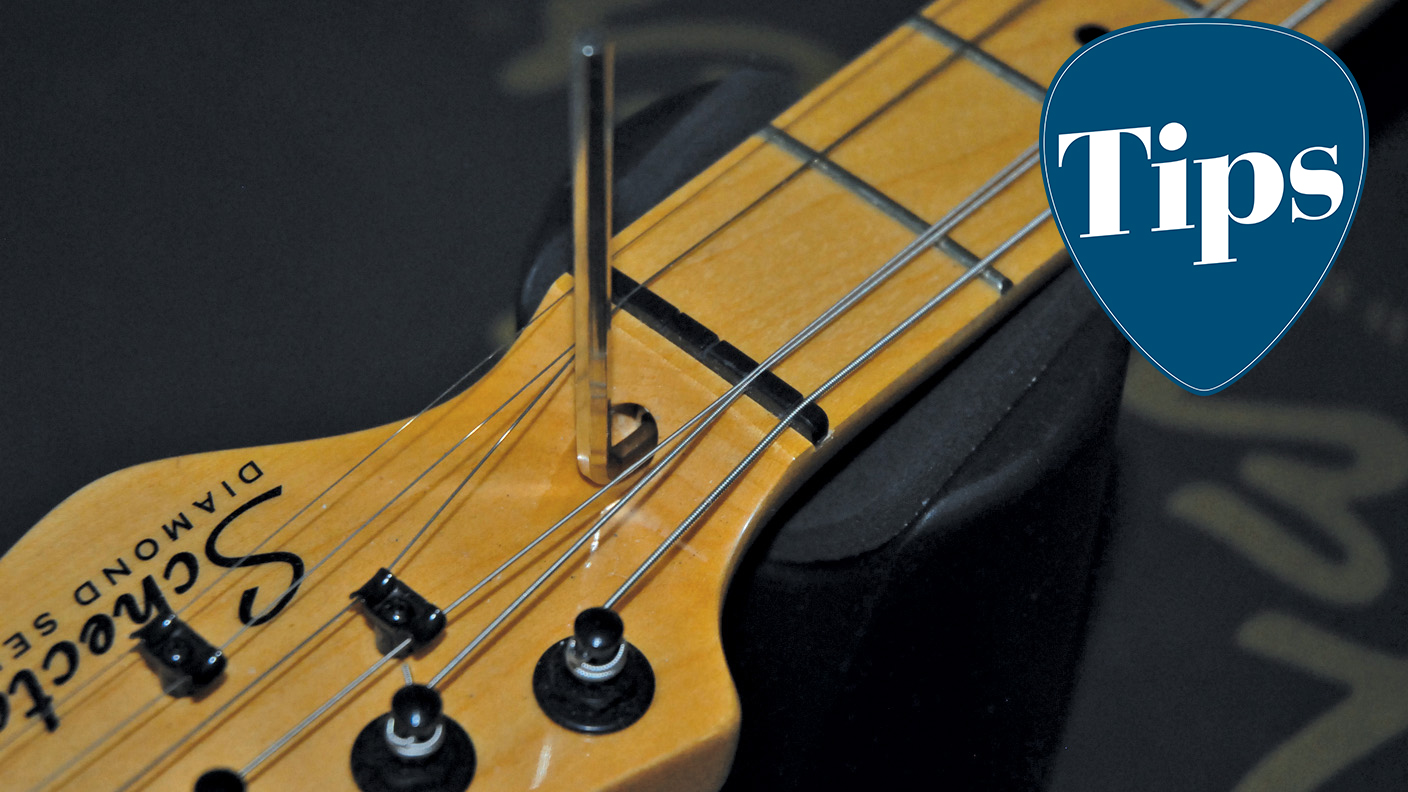
Neck Relief and Truss Rod Adjustments: Tackling the Trials and Tribulations
So you’ve picked up your trusty axe, ready to shred some killer riffs. But wait – is your neck relief throwing you off? Fear not, fellow rocker, for we’re here to guide you through the twists and turns of truss rod adjustments.
First off, remember that patience is key. Don’t rush into cranking that truss rod without a game plan. Take a deep breath, grab a cold beverage, and let’s tackle this together. Here are some tips to help you navigate the murky waters of neck relief:
- Assess the Situation: Is your neck too straight or too bowed? Use a capo and feeler gauges to determine the current state of your neck relief.
- Make Small Adjustments: Don’t go full throttle on that truss rod. Slow and steady wins the race. Make small quarter-turn adjustments and let the wood settle before making any more changes.
Remember, Rome wasn’t built in a day, and neither is a perfectly adjusted neck. Embrace the challenges, learn from your mistakes, and soon you’ll be surfing the fretboard with ease. Happy shredding!
Critical Tips for Achieving Optimal String Height and Tension
So, you want to achieve optimal string height and tension on your instrument, huh? Well, you’ve come to the right place! We’ve got some critical tips that will have you strumming and picking like a pro in no time.
First off, let’s talk string height. You want to find that perfect balance between too high and too low. **Think of it like finding the Goldilocks of string heights – not too high, not too low, but just right.** If your strings are too high, you’ll be fighting against your instrument and risking some serious hand cramps. On the other hand, if your strings are too low, you’ll be dealing with some serious buzz that even bees would envy.
Now, let’s move on to string tension. **You want your strings to feel taut like a tightrope walker without actually feeling like you’re walking a tightrope.** If your strings are too loose, you’ll sound like a floppy fish flopping around on dry land. On the flip side, if your strings are too tight, you’ll feel like you’re dealing with some serious rigidity that even a yoga master couldn’t handle.
Remember, finding the perfect string height and tension is a delicate dance that requires patience and a good ear. So, take your time, tinker around, and soon enough, you’ll be playing with optimal string height and tension that will have everyone saying, “Wow, listen to that sweet sound!”
Maintaining Your Guitar’s Action: Long-Term Strategies for Consistent Performance
So, you’ve finally found that perfect guitar with the action just the way you like it. But how do you ensure that it stays that way for the long haul?
One key strategy for maintaining your guitar’s action is to regularly check and adjust the truss rod. This little metal rod inside your guitar neck is responsible for keeping your neck straight and your action just right. Don’t be scared to give it a little tweak every now and then to keep everything in line.
Another important factor in maintaining consistent performance is keeping your guitar properly humidified. Dry air can wreak havoc on your instrument, causing the wood to contract and the action to change. Invest in a good quality humidifier and keep an eye on the humidity levels in your practice space.
Lastly, don’t forget to regularly clean and condition your fretboard. A gunky, dirty fretboard can cause all sorts of issues with your action and overall playability. Grab some lemon oil or fretboard conditioner and give your fretboard some love every now and then.
FAQs
Is guitar action tuning really necessary?
Well, if you enjoy playing your guitar without feeling like you’re wrestling with a stubborn beast, then yes, it’s necessary. Perfecting the action can make playing smoother and more enjoyable.
How can I tell if my guitar’s action needs tuning?
If your fingers feel like they’re doing a finger workout every time you play, or if your strings buzz like a swarm of angry bees, chances are your action needs some tuning.
Can I tune the action myself?
Of course! Just like tuning your guitar, action tuning is something you can do on your own. All you need is a little patience, some basic tools, and a willingness to get your hands dirty.
What tools do I need for action tuning?
You’ll need a set of Allen wrenches, a screwdriver, and a ruler or gauge to measure the height of your strings. Oh, and perhaps some calming music to ease any frustration that may arise.
Any tips for beginners trying to tune their guitar’s action?
Take it slow, don’t be afraid to experiment, and remember that Rome wasn’t built in a day. It may take some trial and error to find the perfect action for your playing style, but the journey is half the fun!
Strum on and Play on!
Congratulations, you are now equipped with the knowledge to fine-tune your guitar’s action and take your playing to the next level! So grab your trusty instrument, loosen up those strings, and get ready to rock out like never before. Remember, practice makes perfect, but a well-adjusted action makes playing a whole lot sweeter. Happy strumming!
