
Ah, the world of guitar chords – a mystical realm filled with endless possibilities and mind-boggling variations. For those who have just ventured into this enchanted land, fear not! This introductory guide is here to help you navigate through the treacherous waters of major, minor, and everything in between. So grab your axe, tune up those strings, and prepare to embark on a musical adventure like no other. Let’s dive headfirst into the realm of guitar chords and unlock the secrets of harmony and melody.
Contents
- 1 Understanding the Basics: Major and Minor Chords
- 2 Exploring Advanced Chords: Seventh, Ninth, and Beyond
- 3 The Role of Finger Positioning and Strumming Techniques
- 4 Transitioning Between Chords Smoothly: Tips and Exercises
- 5 Incorporating Chord Progressions in Songwriting
- 6 Embracing Barre Chords for a Fuller Sound
- 7 Mastering the Art of Reading Chord Charts and Tabs
- 8 FAQs
- 9 The Final Note
Understanding the Basics: Major and Minor Chords
Major and minor chords are like the yin and yang of the musical world. They couldn’t be more different, yet they somehow complement each other perfectly. Let’s dive into the basics of these two fundamental building blocks of music.
When it comes to major chords, think of them as the happy-go-lucky extrovert of the chord family. They’re bright, cheerful, and always ready to steal the spotlight. If major chords were a person, they’d probably be the life of the party, constantly cracking jokes and making everyone laugh.
On the other hand, minor chords are the brooding introverts of the group. They’re a little moody, a little mysterious, and always seem to have a sad story to tell. If minor chords were a person, they’d be the enigmatic artist sitting in the corner of the coffee shop, sipping their espresso and scribbling in a leather-bound journal.
So, next time you’re strumming away on your guitar or tickling the ivories on your piano, remember the distinct personalities of major and minor chords. And who knows, maybe you’ll find a way to blend the two together to create a musical masterpiece that’s both happy and sad, just like life itself.

Exploring Advanced Chords: Seventh, Ninth, and Beyond
So, you’re tired of playing the same old boring triads and you’re ready to venture into the exciting world of advanced chords. Well, strap in and get ready to go beyond the basics with seventh, ninth, and even beyond chords!
First up, we have the ever-elusive seventh chord. This bad boy adds a whole new dimension to your playing, giving your music that extra dash of sophistication. With its jazzy sound and mysterious allure, the seventh chord is sure to impress all your friends and make you feel like a musical genius.
But why stop at the seventh when you can go all the way to the ninth? That’s right, with the ninth chord, you’ll be reaching new heights of musical greatness. This chord is like the cool, quirky cousin of the seventh, adding even more flavor and complexity to your compositions.
And if you’re feeling really adventurous, why not explore chords beyond the ninth? The possibilities are endless, and the sky’s the limit when it comes to creating unique and exciting sounds. So go ahead, dive into the world of advanced chords and watch your music elevate to a whole new level!

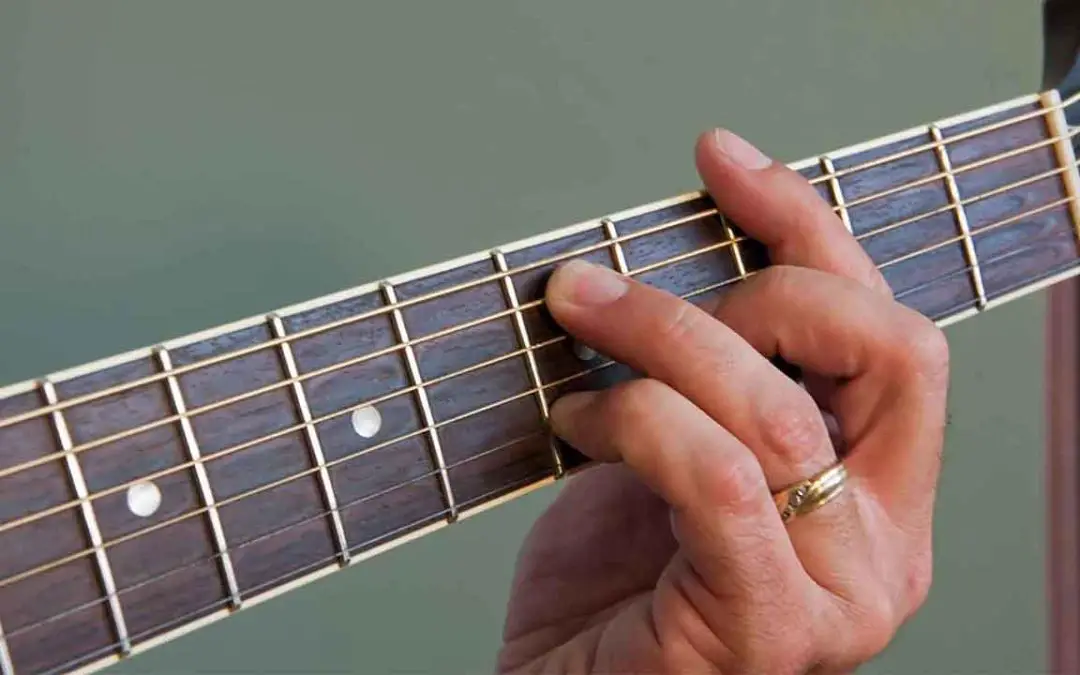
The Role of Finger Positioning and Strumming Techniques
When it comes to playing the guitar, finger positioning and strumming techniques are absolutely crucial. They can make or break your performance, so it’s important to get them right! Let’s take a closer look at how these two elements can influence your playing:
First and foremost, let’s talk about finger positioning. Your fingers are like the keys to a finely-tuned piano – they need to be placed just right to hit the right notes. Make sure your fingers are placed behind the frets, not on top of them, to avoid any unwanted buzzing sounds. And don’t be afraid to get a little calloused – it’s a small price to pay for rockstar status!
Next up, let’s delve into strumming techniques. The way you strum can make all the difference in the world. Try experimenting with different strumming patterns, like down-up-down-up for a classic rock vibe, or up-down-up-down for a more folksy feel. And remember, strumming with confidence is key – own that guitar like it’s your own personal stage!
So there you have it – finger positioning and strumming techniques are the unsung heroes of guitar playing. Embrace them, hone them, and watch your skills soar to new heights. Who knows, maybe one day you’ll be headlining your own sold-out show – all thanks to your trusty fingers and killer strumming skills!

Transitioning Between Chords Smoothly: Tips and Exercises
Have you ever tried to play a song on the guitar, only to get stuck in a tangled mess of fingers and strings when trying to switch between chords? Fear not, for I have some tips and exercises that will help you transition between chords smoothly like a seasoned pro!
First things first, make sure you’re not gripping the neck of your guitar like it owes you money. Your fingers should be relaxed and nimble, ready to slide from one chord shape to the next with ease. And don’t forget about your wrist – keep it loose and flexible, like a noodle in a pot of boiling water.
One helpful exercise is to practice transitioning between two chords that share a finger. For example, try switching between an A minor and a C major chord. Your ring finger stays on the third fret of the A string for both chords, making the transition smoother and faster. It’s like magic, but with less rabbits and more music.
Another useful tip is to visualize the chord shapes in your mind before you even play them. Picture the finger positions and the spaces in between, like a game of musical Tetris. This mental preparation will help your fingers know where to go before you even strum a single note.
Incorporating Chord Progressions in Songwriting
Songwriting can be a tricky business, especially when it comes to incorporating chord progressions. But fear not, fellow musicians! With a little creativity and a lot of practice, you can spice up your tunes and impress your audience with some killer chord progressions.
One way to keep things interesting is to experiment with different chord inversions. By playing the same chords in different positions on the fretboard, you can create a unique and dynamic sound that will keep your listeners on their toes. Don’t be afraid to get creative and try out some unconventional voicings!
Another tip for incorporating chord progressions in your songwriting is to use modal interchange. This fancy term simply means borrowing chords from different modes to add some unexpected twists and turns to your music. Mix things up by throwing in a bIII instead of a typical iii chord, or try using a borrowed chord from a parallel minor key for a darker vibe.
And remember, there’s no right or wrong way to approach chord progressions in songwriting. The most important thing is to let your creativity flow and have fun with it. So grab your guitar, play around with some new chords, and get ready to rock the stage with your killer tunes!
Embracing Barre Chords for a Fuller Sound
So, you’ve decided to take your guitar playing to the next level by embracing barre chords. Congratulations! You’re about to unlock a whole new world of possibilities and achieve a fuller, richer sound. But let’s be real – mastering barre chords can be a frustrating and challenging experience. However, with a little practice and perseverance, you’ll soon be rocking out like a pro.
One of the key benefits of using barre chords is the ability to play the same chord in multiple positions up and down the neck. This means you can create more dynamic and interesting chord progressions that will really impress your audience. Plus, barre chords allow you to incorporate different voicings and inversions, adding depth and complexity to your playing.
When it comes to mastering barre chords, proper finger placement is crucial. Make sure to use the correct finger positioning and apply enough pressure to the strings to ensure a clean, clear sound. It may take some time to build up the necessary finger strength, but trust us – it’s worth the effort. And remember, practice makes perfect, so don’t be afraid to put in the time and effort to hone your barre chord skills.
Lastly, don’t be afraid to experiment with different variations and combinations of barre chords. Get creative with your chord progressions and explore the vast possibilities that barre chords offer. Before you know it, you’ll be playing with a fuller sound that will take your guitar playing to new heights. So grab your guitar, embrace those barre chords, and get ready to rock your audience’s socks off!
Mastering the Art of Reading Chord Charts and Tabs
So, you think you’re ready to tackle those pesky chord charts and tabs, eh? Well, buckle up, buttercup, because we’re about to dive into the wild world of musicianship. Whether you’re a seasoned pro or a total noob, is a crucial skill for any aspiring guitarist.
First things first, let’s talk about chord charts. These bad boys look like a bunch of hieroglyphics at first glance, but fear not! They’re actually pretty straightforward once you know what you’re looking at. Remember: each chord chart represents a specific chord that you’ll need to play. Got it? Good. Now, pay close attention to those little numbers on top of each string. That’s where the magic happens. Those numbers tell you which fret to press down on each string. So, think of it like a secret code that unlocks the sweet sounds of music.
Now, let’s move on to everyone’s favorite headache-inducer: tabs. Tabs are like the Cliff’s Notes version of sheet music – they give you the bare bones of a song without all the fancy frills. Each number on a tab corresponds to a fret on your guitar. Simple, right? Well, not so fast. Tabs can get pretty freaking weird sometimes. You’ll see crazy symbols, weird timing notations, and cryptic instructions that’ll make you question your sanity. But hey, that’s all part of the fun!
So, there you have it. Reading chord charts and tabs may seem like a daunting task, but with some practice and a healthy dose of patience, you’ll be shredding like a rockstar in no time. Just remember: music is supposed to be fun, so don’t stress yourself out too much. Keep plucking those strings, keep strumming those chords, and most importantly, keep rocking on!
FAQs
How many chords do I need to know to be a guitar master?
Well, to be a guitar master, you’ll need to know more than just a few basic chords. But don’t worry, even seasoned pros started out with the basics. Start with learning the basic major, minor, and dominant chords, and then gradually work your way up to more complex chords like suspended, augmented, and diminished ones. The more chords you know, the more versatile you’ll be as a guitarist!
Are barre chords really necessary?
Ah, the dreaded barre chords! While they may seem intimidating at first, mastering barre chords can really take your guitar playing to the next level. They allow you to play chords all over the fretboard and give you access to a whole new world of chord shapes. So, yes, barre chords are definitely worth learning if you want to expand your repertoire and challenge yourself as a guitarist.
How do I transition between chords smoothly?
Transitioning between chords can be tricky, especially when you’re just starting out. The key is to practice, practice, practice! Start by practicing each chord individually until you can play it without thinking. Then, practice transitioning between two chords until you can do it smoothly and without hesitation. Gradually add more chords into the mix until you can seamlessly transition between all of them. It may take some time and effort, but with practice, you’ll be switching chords like a pro in no time!
What are some tips for memorizing chord shapes?
Memorizing chord shapes can be a daunting task, but there are a few tricks that can make it easier. One tip is to practice visualizing the chord shapes in your mind before you play them. Another tip is to practice naming the notes in each chord, as this can help you understand the structure of the chord and remember it more easily. Additionally, try practicing chord progressions in different keys and contexts to reinforce your memory of the shapes. With time and practice, you’ll have those chord shapes committed to memory in no time!
The Final Note
Congratulations on making it through this crash course on guitar chords! Remember, just like learning to navigate a new city, mastering chords takes time, patience, and a good sense of direction (literally and figuratively). Don’t get discouraged if you hit a few wrong notes along the way – even the pros started out strumming out of tune.
So grab your guitar, keep practicing, and soon enough you’ll be shredding like a rockstar. Until next time, happy strumming!
