
So, you’ve finally decided to pick up the guitar and become the next rock star sensation. But before you start shredding like a pro, you’ve got to master the basics - and that means learning your first chords. Don’t worry, we’ve got the key lessons you need to transform from a clueless beginner to a chord-strumming master in no time. So grab your guitar, strap in, and get ready to rock out with your… well, with your chords out. Let’s dive in! Understanding the Fundamentals of Guitar Chords“>
Contents
- 1 Understanding the Fundamentals of Guitar Chords
- 2 Developing Proper Finger Placement and Technique
- 3 Learning to Transition Between Chords Smoothly
- 4 Practicing with a Metronome to Improve Timing
- 5 Exploring Open Chords for Beginners
- 6 Incorporating Basic Strumming Patterns to Accompany Chords
- 7 Overcoming Common Challenges Faced by Beginner Guitarists
- 8 FAQs
- 9 Strum your way to success
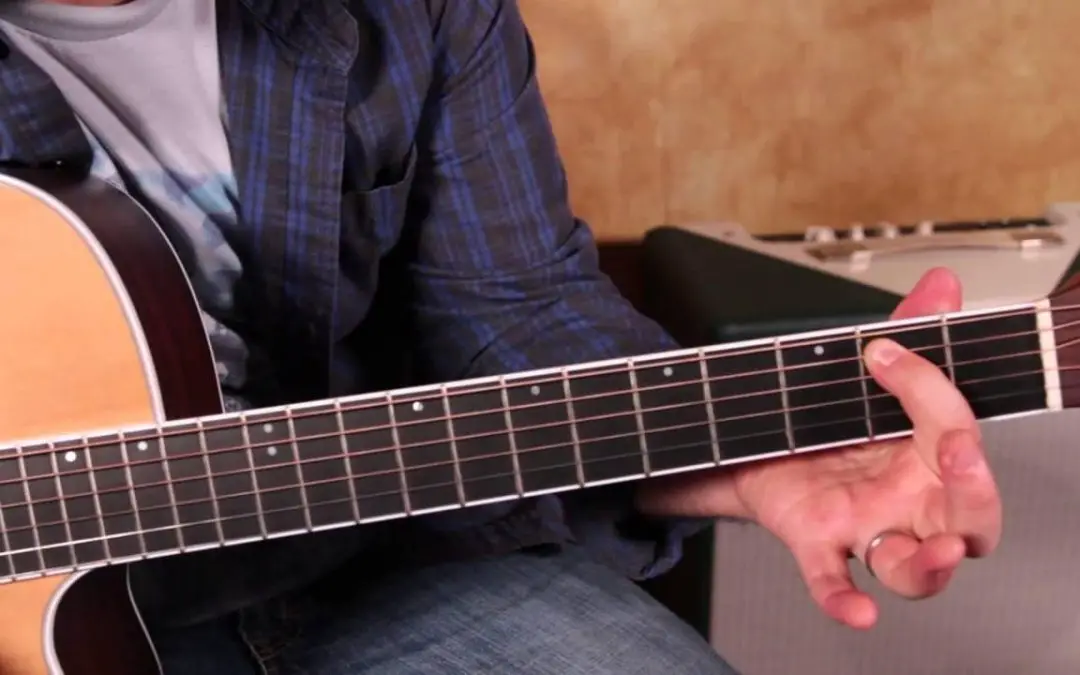
Understanding the Fundamentals of Guitar Chords
So you’ve picked up a guitar and you’re ready to rock out like a pro. But before you start shredding like Jimi Hendrix, you need to understand the fundamentals of guitar chords. Fear not, my aspiring rock star, for I am here to guide you through the wonderful world of chords.
First things first, let’s talk about the basics. A chord is a group of three or more notes played together to create harmony. There are different types of chords, but the most common ones are major, minor, and dominant. Each chord has a unique sound and feel, so experiment with different combinations to find your groove.
Now, let’s break it down even further. To play a chord, you need to place your fingers on specific frets and strings. Each fret represents a different note, so make sure you press down firmly to get a clear sound. And don’t forget to strum the strings with confidence – no wimpy strumming allowed!
As you venture into the world of guitar chords, remember to practice, practice, practice. Rome wasn’t built in a day, and neither will your rock stardom. So grab your guitar, unleash your inner rock god, and let the power of chords take you to new musical heights!
Developing Proper Finger Placement and Technique
Proper finger placement and technique are key to mastering any musical instrument, especially when it comes to playing the piano. Here are some tips to help you develop those skills:
- Use all five fingers: Don’t rely solely on your index or middle fingers – give all of them a chance to shine!
- Keep your fingers curved: Pretend you’re holding onto a small bubble with each finger – don’t flatten them out like pancakes!
- Practice, practice, practice: Rome wasn’t built in a day, and neither is a virtuoso pianist. Keep at it, even when your fingers feel like they’re going to fall off.
Remember, takes time and patience. Don’t get discouraged if you’re not perfect right away – even the greatest musicians had to start somewhere. So keep tickling those ivories and soon enough, you’ll be dazzling audiences with your impeccable fingerwork!

Learning to Transition Between Chords Smoothly
So, you’ve finally mastered playing individual chords on your guitar. Congratulations! But now comes the real challenge – transitioning between chords smoothly. Don’t worry, we’ve all been there. It’s like trying to juggle flaming swords while riding a unicycle, but with practice and patience, you’ll get the hang of it.
One tip that can really help with smooth chord transitions is to focus on your hand positioning. Make sure your fingers are hovering over the correct frets before you need to make the switch. It’s like playing a real-life game of Whac-A-Mole, but instead of trying to hit those sneaky moles, you’re trying to nail those chord changes.
Another trick is to visualize the chord shapes in your mind before you make the switch. It’s like playing a game of Guitar Hero, but instead of hitting buttons on a plastic guitar, you’re hitting chords on a real one. By mentally preparing yourself for the next chord, you’ll be able to make the transition more smoothly and effortlessly.
And remember, Rome wasn’t built in a day. It takes time and practice to master the art of transitioning between chords smoothly. So don’t get discouraged if it doesn’t click right away. Keep strumming, keep practicing, and soon enough, you’ll be seamlessly gliding from one chord to the next like a pro.

Practicing with a Metronome to Improve Timing
So, you’ve decided to take your timing skills to the next level by practicing with a metronome. Let me tell you, it’s a game-changer! But before you dive in, here are a few tips to make the most out of your metronome practice:
First off, start slow. **Seriously**. If you try to keep up with a fast tempo right off the bat, you’re going to crash and burn. Set your metronome to a manageable tempo and work your way up gradually. Trust me, it’s better to start slow and steady than to rush and stumble.
Another tip: experiment with different time signatures. **Mix it up**! Practicing with a metronome doesn’t have to be boring. Try playing in 3/4, 7/8, or even 5/4. Not only will it improve your timing, but it’ll also make you a more versatile musician.
And lastly, don’t forget to have fun! **Seriously**, timing exercises can be a blast if you approach them with a positive mindset. Play around with the metronome, get creative with your rhythms, and most importantly, enjoy the process. Before you know it, you’ll be a timing pro!

Exploring Open Chords for Beginners
So, you’ve decided to dive into the world of guitar playing and are eager to learn some open chords that will have you strumming like a rock star in no time! Well, you’ve come to the right place because we’re about to explore some beginner-friendly open chords that will have you feeling like a pro in no time!
First up, let’s talk about the all-important C major chord. This bad boy is as basic as they come, but oh so versatile! Just place your index finger on the first fret of the B string, your middle finger on the second fret of the D string, and your ring finger on the third fret of the A string. Strum away, my friend!
Next, let’s tackle the G major chord. This one has a bit of a stretch involved, so be prepared to flex those finger muscles! Place your index finger on the second fret of the A string, your middle finger on the third fret of the low E string, and your pinky finger on the third fret of the high E string. Rock on!
Now, let’s not forget about the trusty D major chord. This one is a crowd favorite and for good reason! Place your index finger on the second fret of the G string, your ring finger on the third fret of the B string, and your middle finger on the second fret of the high E string. Strum away and feel the music flow through you!
Incorporating Basic Strumming Patterns to Accompany Chords
Alright folks, so you’ve mastered those basic chords and now it’s time to level up your guitar playing with some killer strumming patterns. But don’t fret (pun intended), incorporating strumming patterns to accompany chords is easier than you think!
First things first, let’s break it down. Start off by choosing a simple chord progression to work with. Maybe strumming along to a classic like G, C, D, G will get you in the groove. Now, instead of just mindlessly strumming up and down, let’s spice it up with some basic strumming patterns.
One of the most common strumming patterns is the Down-Up strum. Simply strum downwards with your pick and then strum upwards. Repeat this pattern to add a groovy rhythm to your chord progression. And remember, practice makes perfect, so don’t be afraid to start off slow and gradually speed up as you get more comfortable.
Feeling a little fancy? Try incorporating the popular DDU-UDU pattern. This means you’ll strum Down-Down-Up, then Up-Down-Up. It may sound like a tongue twister, but once you get the hang of it, your chords will sound like magic! So grab your guitar, pick a chord progression, and let your strumming patterns take center stage.
Overcoming Common Challenges Faced by Beginner Guitarists
So you’ve decided to pick up the guitar and embark on your musical journey – congratulations! But let’s be real, being a beginner guitarist comes with its fair share of challenges. From sore fingers to frustrating chord changes, it can feel like a never-ending battle. But fear not, dear novice strummer, for I am here to guide you through these rocky waters.
One of the most common challenges faced by beginner guitarists is the dreaded sore fingers. You pick up your guitar, start strumming away, and before you know it, your fingertips feel like they’ve been set on fire. But fret not (pun intended), for this is just a rite of passage for all guitarists. Embrace the pain, for it is a sign that you are on the path to becoming a true rock star.
Another hurdle that many new guitarists face is the frustration of mastering chord changes. Your fingers seem to have a mind of their own, refusing to obey your commands and landing on all the wrong strings. But remember, Rome wasn’t built in a day, and neither will your smooth chord transitions. Practice, practice, practice – and one day, you will look back at this struggle and laugh (or maybe cry tears of joy).
And let’s not forget the age-old challenge of tuning your guitar. You turn those tuning pegs this way and that, strumming the strings in desperate hope of hearing a harmonious melody. But alas, you are met with nothing but discord. Fear not, for there are many resources available to help you conquer this beast. From tuning apps to online tutorials, the power to tune is within your grasp. Keep at it, and soon you’ll be hitting all the right notes like a pro.
FAQs
Why is it important to focus on mastering basic chords as a beginner guitarist?
Well, if you want to play anything other than Mary Had a Little Lamb on repeat, you’re gonna need to know your chords. They’re the building blocks of all those sick riffs and melodies you dream of shredding one day.
How can I improve my chord transitions?
Ah, the age-old struggle of moving your fingers from one shape to another without sounding like a dying cat. The key here is practice, my friend. Start slow, break it down into smaller steps, and before you know it, you’ll be transitioning like a seasoned pro.
Why is proper finger placement crucial when playing chords?
Well, for starters, have you ever tried to play a chord with your elbow? Yeah, not so melodious, right? Proper finger placement ensures that you’re hitting all the right notes and that your guitar doesn’t sound like a honky-tonk mess.
How can I make practicing chords more fun and engaging?
Who says practicing chords has to be boring? Spice things up by turning it into a game. Challenge yourself to see how many chord changes you can make in a minute or reward yourself with a mini dance party every time you nail a tricky transition. Guitar hero, eat your heart out!
What are some common mistakes that beginner guitarists make when learning chords?
Oh, where do I even begin? From death-gripping your fretboard like it’s about to run away to completely ignoring that buzzing sound coming from your strings, beginner guitarists make plenty of mistakes. The key is to stay patient, stay focused, and maybe invest in some earplugs for your roommates’ sake.
Strum your way to success
Congratulations, young padawan! You have now embarked on the noble quest of mastering your first chords on the guitar. Remember, even the greatest rockstars were once beginners just like you. So keep practicing, keep strumming, and most importantly, keep having fun with your new musical journey. And who knows, maybe one day, you’ll be the one headlining sold-out concerts and shredding guitar solos like a true rock god. Until then, keep on rocking and never stop strumming!
