

Struggling to navigate the jungle of chord diagrams on your quest to become a guitar hero? Fear not, intrepid musician! This guide is here to help you conquer the tangled web of strings and dots and emerge victorious on the fretboard battlefield. So grab your guitar, sharpen your pick, and get ready to embark on a musical adventure like no other. Let’s rock and roll our way to chord diagram mastery!
Contents
- 1 Understanding the Basics of Chord Diagrams for Guitar
- 2 Diving Deeper into Chord Diagram Symbols and Notations
- 3 Strategies for Quick Recognition and Memorization of Chord Shapes
- 4 Translating Chord Diagrams into Smooth Chord Transitions
- 5 Mastering Advanced Chord Diagrams for Genre-Specific Techniques
- 6 Exploring the World Beyond Standard Tunings with Chord Diagrams
- 7
- 8 FAQs
- 9 Rock On!
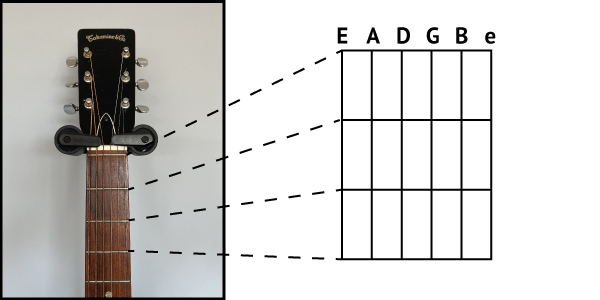
Understanding the Basics of Chord Diagrams for Guitar
So you’ve decided to embark on the noble journey of mastering the guitar, eh? Well, buckle up buttercup because we’re diving straight into the wonderful world of chord diagrams!
Now, I know what you’re thinking – “Why do I need to bother with these fancy diagrams when I can just wing it and play by ear?” Well, my friend, let me tell you – using chord diagrams will make your life a whole lot easier and save you from countless hours of frustration. Trust me, nobody wants to listen to you massacre “Wonderwall” because you couldn’t be bothered to learn the basics.
So, what exactly is a chord diagram, you ask? It’s essentially a visual representation of where to place your fingers on the fretboard to play a specific chord. Think of it as a treasure map, leading you to the musical gold hidden within your guitar.
With a little bit of practice and a whole lot of patience, you’ll soon be strumming away like a rockstar. Plus, impressing your friends at parties with your newfound guitar skills will be quite the ego boost. So grab your guitar, grab those chord diagrams, and get ready to rock and roll!
Diving Deeper into Chord Diagram Symbols and Notations
So you think you’ve mastered the basics of chord diagram symbols and notations, huh? Well, strap in because we’re about to dive even deeper into this world of musical hieroglyphics!
First off, let’s talk about those little dots you see on the chord diagrams. Contrary to popular belief, they are not just there for decoration (although they do add a certain je ne sais quoi to the diagram). Each dot represents a finger on your hand, eagerly waiting to press down on that string and create beautiful music. So, next time you see a dot, remember: it’s not just a dot, it’s a musical opportunity!
Now, let’s discuss those mysterious numbers you sometimes see above the chord diagrams. These numbers are not just random digits thrown onto the page by some mischievous guitar fairy. No, they actually represent the fret number. Yes, that’s right – the number of the fret where your finger should be placed. So, if you see a “5” above the diagram, you better believe your finger needs to be on the 5th fret. It’s like a secret code just waiting to be deciphered!
And finally, let’s not forget about those strange lines connecting different dots on the diagram. These lines are not just lines – they are the pathways to chord mastery! They show you which fingers should be held down at the same time, creating a harmonious blend of notes that will make your heart sing. So, pay attention to those lines and follow them like a treasure map to musical greatness!

Strategies for Quick Recognition and Memorization of Chord Shapes
When it comes to memorizing chord shapes, it can often feel like trying to remember the lyrics to a song you heard once five years ago. But fear not, fellow guitarists! There are some strategies you can employ to make the process a little less painful and a lot more efficient.
First and foremost, practice makes perfect. Spend some quality time with your guitar and those pesky chord shapes. The more you practice, the more familiar they’ll become, and eventually, you’ll be able to recognize them at a glance. It’s like trying to remember the name of that actor who was in that movie - it may take a few tries, but eventually it’ll click.
Another handy tip is to create visual aids to help jog your memory. Draw out the chord shapes on a piece of paper, or better yet, invest in some chord flashcards (yes, they do exist). By physically seeing the chord shapes in front of you, you’ll start to make those connections in your brain faster than you can say “G major.”
And lastly, don’t forget to have a sense of humor about it all. Learning to play the guitar is supposed to be fun, so don’t get too bogged down in the minutiae of chord shapes. Remember, even the greatest guitarists in the world started out as beginners once upon a time. So embrace the process, laugh at your mistakes, and soon enough, you’ll be playing those chord shapes like a pro.

Translating Chord Diagrams into Smooth Chord Transitions
So you’ve mastered reading chord diagrams, but now you’re faced with the daunting task of transitioning smoothly between chords. Don’t worry, we’ve got you covered! With a little practice and a lot of patience, you’ll be seamlessly moving from one chord to the next in no time.
First things first, make sure you have a firm grasp of the finger placements for each chord. If you find yourself fumbling around trying to figure out where your fingers should go, you’re bound to hit some sour notes. Practice transitioning between chords slowly at first, focusing on getting your fingers in the right position without rushing.
Another trick is to visualise the movement of your fingers between chords before you actually play them. This will help your muscle memory kick in and make the transitions feel more natural. And remember, practice makes perfect! The more you practice transitioning between chords, the easier it will become.
Lastly, don’t be afraid to experiment with different fingerings and positions to find what works best for you. Each guitarist is unique, so what works for one person may not work for another. Be patient with yourself and keep a positive attitude – before you know it, you’ll be playing those smooth chord transitions like a pro. Keep strumming and don’t give up – you’ve got this!
Mastering Advanced Chord Diagrams for Genre-Specific Techniques
So you think you’re the next guitar virtuoso, ready to conquer the music world with your genre-specific techniques? Well, before you go headbanging on stage or crooning your heart out, you need to master those advanced chord diagrams like a true rockstar.
Forget about your basic open chords and simple power chords; we’re talking about diving deep into those intricate finger positions and complex shapes that will set you apart from the average strummer. It’s time to level up your chord game and unleash your inner guitar god.
Here are a few tips to help you navigate the world of advanced chord diagrams:
- Practice makes perfect: Spend hours honing your skills and mastering each chord shape until it becomes second nature. Your fingers will thank you later.
- Experiment with different voicings: Don’t limit yourself to one position for each chord. Try out different variations to find the sound that suits your genre best.
- Learn from the pros: Study the chord diagrams of your favorite guitarists and see how they incorporate unique voicings and shapes into their music. Emulate their techniques and adapt them to your own style.
Exploring the World Beyond Standard Tunings with Chord Diagrams
Are you tired of the same old standard guitar tunings? Feel like you’ve explored every chord progression possible in EADGBE? Well, get ready to shake things up and dive into the world beyond standard tunings with these chord diagrams!
Unlock a whole new dimension of sound by experimenting with alternative tunings like drop D, open G, or DADGAD. With just a few tweaks to your strings, you can unlock a treasure trove of new chord shapes and harmonic possibilities. No more boring barre chords – it’s time to spice up your playing with some fresh, unconventional sounds!
Don’t be afraid to venture into uncharted territory – after all, music is all about exploration and discovery. Embrace the unknown and let your creativity run wild as you strum your way through uncharted chord progressions and unexpected harmonies. Who knows, you might just stumble upon your own unique musical signature that sets you apart from the crowd!
So grab your guitar, pick up these new chord diagrams, and prepare to embark on a musical journey like no other. The world beyond standard tunings is waiting for you – are you ready to take the plunge?
navigation-skills”>Practical Exercises for Enhancing Chord Diagram Navigation Skills
So, you’ve mastered the basics of chord diagram navigation and you’re ready to take your skills to the next level? Look no further! Here are some fun and practical exercises that will help you become a chord diagram master in no time.
First up, try challenging yourself with some speed drills. Set a timer and see how quickly you can navigate through a series of chord diagrams. The faster you can locate the chords, the better your skills will become. Just remember, accuracy is key!
Next, test your memory by playing a game of Chord Diagram Memory. Print out several chord diagrams and lay them out in a grid. Take turns flipping over two cards at a time, trying to find matching chord diagrams. This will not only improve your memory but also reinforce your knowledge of chord shapes.
For a more advanced exercise, try Chord Diagram Puzzles. Print out a large chord diagram and cut it into several pieces. Mix up the pieces and try to put the diagram back together as quickly as possible. This exercise will help you visualize the chord shapes in a new way and improve your problem-solving skills.
FAQs
How can I learn to navigate chord diagrams like a pro?
Well, first off, put down that air guitar and pick up the real deal! Then, start studying those chord diagrams like it’s your new religion. Practice, practice, practice until your fingers bleed (metaphorically, of course).
Are there any shortcuts or tips for mastering chord diagram navigation?
Absolutely! One sneaky trick is to look for patterns in the diagrams. Once you start recognizing common shapes and groupings, you’ll be zooming through those diagrams like a rockstar on stage.
What should I do if I come across a chord diagram that looks like a foreign language?
Don’t panic! Take a deep breath, channel your inner guitar god or goddess, and break it down piece by piece. Focus on one finger position at a time until you’ve cracked the code.
Is it important to memorize all the chord diagrams or can I just wing it?
While flying by the seat of your pants can be fun, it’s definitely worth putting in the effort to memorize those chord diagrams. It’ll make your playing smoother, more confident, and way less likely to make your audience cringe in secondhand embarrassment.
Any final words of wisdom for aspiring chord diagram navigators?
Just remember, Rome wasn’t built in a day, and neither is your guitar prowess. Embrace the journey, soak up the knowledge, and most importantly, have fun with it! The world is your oyster, or should I say, your guitar pick.
Rock On!
Congratulations, rockstar! You are now equipped with the skills to conquer those chord diagrams like a true guitar legend. So go forth, strum those strings, and let the music take you on a wild ride. Remember, mastering chord diagram navigation is just one step towards becoming the ultimate guitar god. Keep practicing, keep shredding, and most importantly, keep on rockin’!
