
In the world of music, there are few things more frustrating than fumbling through chord transitions like a blindfolded juggler trying to keep his balls in the air. But fear not, fellow musicians, for we have the secret to mastering efficient chord transitions and achieving polished precision! Grab your instrument, warm up those fingers, and get ready to dazzle your audience with seamless shifts that would make even a contortionist jealous. It’s time to perfect your chord transitions and take your musical prowess to the next level. Let’s make those changes smoother than a baby’s bottom and cleaner than a freshly polished saxophone.
Contents
- 1 Understanding the Basics of Chord Transitions
- 2 Exploring Common Challenges in Chord Transition
- 3 Techniques for Smoother and Faster Chord Changes
- 4 Incorporating Effective Hand Positioning for Efficiency
- 5 Advanced Strategies for Mastering Complex Transitions
- 6 Practicing with Purpose: Exercises for Polished Precision
- 7 Evaluating Progress and Setting Goals for Continuous Improvement
- 8 FAQs
- 9 Wrap Up: Keep Calm and Transition On!
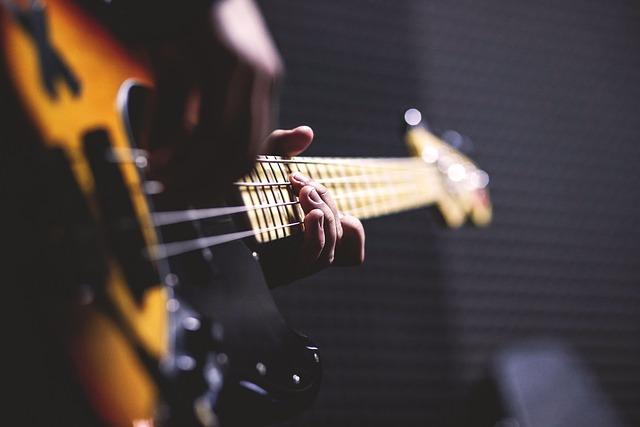
Understanding the Basics of Chord Transitions
So, you’ve mastered playing basic chords on your guitar or piano and now you’re ready to take it to the next level. Congratulations! It’s time to dive into the world of chord transitions and elevate your musical skills.
First things first, let’s talk about why chord transitions are important:
- They add depth and variety to your music
- They keep your audience engaged and interested
- They sound pretty darn cool
Now, let’s break it down. Chord transitions are like the musical equivalent of a smooth dance move. You want them to flow seamlessly from one chord to the next, creating a harmonious and catchy sound that will have your listeners tapping their feet and nodding their heads in approval.
Here are a few tips to help you nail those transitions like a pro:
- Practice, practice, practice. The more you work on transitioning between chords, the smoother it will become.
- Focus on your finger placement. Make sure your fingers are in the right position before making the switch.
- Use a metronome to keep your timing in check. You don’t want to be that musician who can’t keep a steady beat.
Remember, Rome wasn’t built in a day and neither were your chord transition skills. Keep at it, have fun, and soon enough you’ll be rocking out like a musical virtuoso.
Exploring Common Challenges in Chord Transition
Transitioning between chords can be a real struggle for a lot of musicians. It’s like trying to navigate a minefield with your fingers, hoping you don’t hit a wrong note and blow up the whole song. Here are some common challenges that you may encounter in your chord transitions:
Finger Twister: Ever feel like your fingers are playing an intense game of Twister on the fretboard? Trying to contort your hand into weird shapes to hit those elusive chords can feel like a workout for your digits. And just when you think you’ve got it, one wrong move and it’s game over.
The Sneaky Ninja Chord: You think you’ve nailed the transition from A to D, only to realize that sneaky ninja chord (looking at you, F#m) has snuck up on you and thrown off your whole groove. It’s like a musical game of hide-and-seek, and that ninja chord always knows how to find the perfect hiding spot.
Speed Racer: You want to impress everyone with your lightning-fast chord transitions, but your fingers just can’t seem to keep up with your brain. It’s like trying to drive a Ferrari with a broken accelerator – you’re revving up, but you just can’t shift into high gear fast enough.

Techniques for Smoother and Faster Chord Changes
So you’ve been playing the guitar for a while now, and you’ve finally conquered those pesky barre chords – congratulations! But now you’re facing a new challenge: switching between chords quickly and smoothly. Don’t worry, we’ve got some tips and tricks that will have your fingers flying across the fretboard in no time.
First off, let’s talk about finger positioning. Make sure your fingers are close to the frets and on their tips to minimize the distance they have to travel between chords. Keep your thumb in the middle of the back of the neck for optimal leverage. And remember, practice makes perfect – the more you practice, the quicker and smoother your chord changes will become.
Another technique you can use is to visualize the chord shapes in your mind before you make the switch. This will help your brain send signals to your fingers more efficiently, making the transition smoother. And don’t be afraid to use a metronome to help you keep a steady rhythm while you’re practicing – it will also help train your muscles to make the changes faster.
Lastly, don’t forget to relax! Tension in your fingers and hands will only slow you down. Take a deep breath, shake out any tension, and approach each chord change with confidence. With a bit of practice and these techniques in your toolbelt, you’ll be rocking out like a pro in no time!

Incorporating Effective Hand Positioning for Efficiency
Effective hand positioning is key to maximizing efficiency in any task. Whether you’re typing up a storm on your keyboard or crafting the perfect sandwich, where you place your hands can make all the difference. Here are some tips to help you incorporate effective hand positioning into your daily routine:
- Keep your fingers relaxed and slightly curved, like you’re holding a delicate cup of tea. This will help prevent strain and fatigue in your hands.
- When using a keyboard, make sure your wrists are in a neutral position and your fingers are hovering over the home row. It’s like playing a piano concerto, but with more backspacing.
- For tasks that require gripping, like opening a stubborn jar or wrestling with a pickle jar, use your whole hand instead of just your fingers. Think of it as giving the jar the ol’ bear hug treatment.
Remember, proper hand positioning not only improves efficiency but also reduces the risk of repetitive strain injuries. So, next time you find yourself reaching for that stapler or reaching for the sky, take a moment to check your hand positioning and make sure you’re setting yourself up for success. Your hands will thank you, and so will your pickle jars.
Advanced Strategies for Mastering Complex Transitions
So, you think you’ve got transitions all figured out, huh? Well, get ready to take your skills to the next level with these :
First things first, have you ever tried using keyframes to control the timing and easing of your transitions? This nifty little trick allows you to create custom animations that will make your transitions truly stand out. Plus, you’ll impress all your friends with your newfound animation skills.
Next, why not experiment with transform functions to add some extra flair to your transitions? Whether you want to rotate, scale, skew, or even 3D transform your elements, the possibilities are endless. Just remember to use them sparingly – you don’t want to make your transitions too flashy, unless of course, you’re going for the “disco fever” look.
And finally, don’t forget to take advantage of transition shorthand to combine multiple transition properties into a single line of code. This will not only streamline your CSS but also make your code easier to read and maintain. It’s a win-win situation – just like finding a surprise fry at the bottom of your fast-food bag.
Practicing with Purpose: Exercises for Polished Precision
So you’ve decided to take your skills to the next level and polish your precision like a pro! Here are some exercises that will have you dancing through your practices with purpose:
1. **Mirror, Mirror on the Wall**: Stand in front of a mirror and practice your moves while watching yourself. This will help you to notice any areas where you might be sloppy or lacking in precision. Plus, you’ll look super cool while doing it!
2. **Slow Motion**: Slow things down and focus on every single movement. Think of yourself as a slo-mo video and pay attention to all the tiny details. This exercise will help you become more aware of your body and movements.
3. **Spot Drills**: Pick a spot on the wall or floor and aim to hit it every time. This will improve your accuracy and precision, making your moves look sharp and on point. Plus, you’ll develop a keen eye for detail.
Evaluating Progress and Setting Goals for Continuous Improvement
So, you’ve been working hard towards your goals but you’re not quite where you want to be yet. That’s okay, we’ve all been there! It’s time to evaluate your progress and set some new goals for continuous improvement.
First things first, let’s look at what you’ve accomplished so far. Take a moment to pat yourself on the back for all the hard work you’ve put in. Maybe you’ve made some small victories or maybe you’ve had a major breakthrough – no matter what, it’s important to celebrate your wins, big or small.
Next, let’s take a look at where you fell short. Don’t beat yourself up about it, we’re all a work in progress. Identify areas where you can improve and make a plan to tackle them head on. Maybe you need to work on time management, or maybe you need to sharpen your skills in a certain area – whatever it is, set some specific goals to help you get there.
Remember, continuous improvement is all about small, consistent steps forward. Don’t overwhelm yourself with huge goals that seem impossible to reach. Break them down into manageable chunks and tackle them one by one. Before you know it, you’ll be well on your way to success!
FAQs
Why are efficient chord transitions important?
Efficient chord transitions are important because no one wants to hear clunky, awkward shifts between chords. Smooth transitions keep the groove going and make you look like a total pro.
How can I improve my chord transitions?
Practice, practice, practice! Seriously, spend some time honing your finger placement and muscle memory. Also, try slowing things down and really focusing on each movement.
Any tips for making chord transitions smoother?
One word: pivot. Use a common finger or note between chords to help guide your fingers to the next position. It’s like a musical GPS for your hands.
What should I do if I keep messing up a particular chord transition?
Don’t get discouraged! Take a break, shake it out, and come back with a fresh mindset. Analyze what’s tripping you up and focus on that specific transition until it becomes second nature.
Is it better to focus on speed or accuracy when practicing chord transitions?
Accuracy first, speed second. You can’t shred like a rock god if your transitions sound like a train wreck. Once you have the movements down pat, then you can work on ramping up the tempo.
Should I use a metronome when practicing chord transitions?
Absolutely! A metronome will not only help you stay in rhythm, but it will also push you to work on your timing and precision. Plus, you’ll feel like a musical genius conducting your own private symphony.
Wrap Up: Keep Calm and Transition On!
Congratulations on leveling up your chord transition skills! Remember, practice makes perfect, so don’t get discouraged if you haven’t mastered it right away. Keep calm, keep practicing, and soon you’ll be smoothly gliding through chord changes like a pro. And who knows, maybe one day you’ll even give John Mayer a run for his money! Keep strumming, keep rocking, and most importantly, keep that polished precision going strong. Happy playing!
