
So you’ve decided to take matters into your own hands and tackle the daunting task of setting up your own guitar. Congratulations, you brave musical warrior! Get ready to embark on a journey through the wild and wacky world of DIY guitar setups, where your trusty tools will be your swords and your tuning pegs will be your shield. Follow along step-by-step in this ultimate guide to transforming your beloved axe from a hot mess to a harmonious masterpiece. Let’s rock and roll, baby!
Contents
- 1 Understanding the Anatomy of Your Guitar
- 2 Assessing Your Guitar’s Current Setup
- 3 Adjusting the Truss Rod for Perfect Neck Relief
- 4 Setting Up the String Action for Optimal Playability
- 5 Fine-Tuning the Intonation for Accurate Pitch
- 6 Examining and Adjusting the Pickups for Ideal Sound
- 7 Caring for Your Guitar Post-Setup: Maintenance Tips and Tricks
- 8 FAQs
- 9 Strum on, DIYers!
Understanding the Anatomy of Your Guitar
So, you’re looking at your beautiful six-stringed friend and thinking, “What are all these parts even called?” Don’t worry, I’ve got you covered! Let’s dive into the wacky world of guitar anatomy.
First up, we have the headstock. This is where all the magic begins – it houses the tuning pegs that keep your strings in check. Think of it as the captain of the ship, guiding your guitar into musical greatness.
Next, we have the neck. This is where your fingers work their magic, dancing across the frets like a well-practiced ballet. It’s like the highway of your guitar, connecting the headstock to the body in perfect harmony.
Now, let’s talk about the body of your guitar. This is where all the sound comes to life, vibrating through the soundhole like a symphony in motion. It’s the heart of your instrument, pumping out beautiful melodies with each strum.
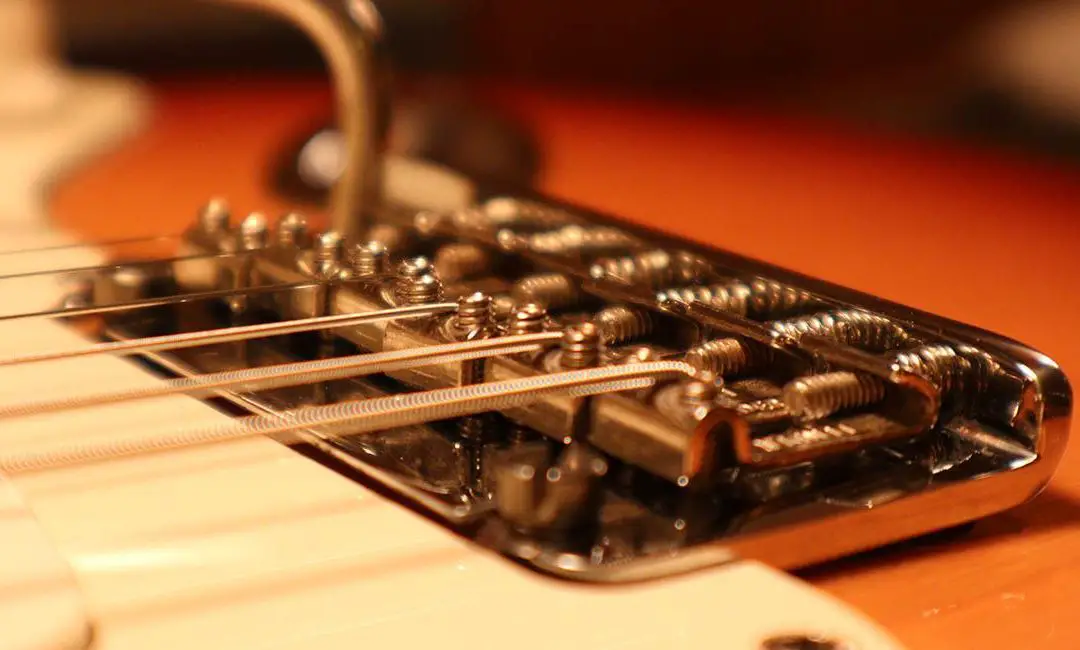
And finally, we have the bridge and saddle. These little guys may seem insignificant, but they play a crucial role in holding your strings in place and transferring their vibrations to the body. Think of them as the unsung heroes of your guitar, quietly ensuring that your music sounds pitch-perfect every time you play.
Assessing Your Guitar’s Current Setup
So, you’ve been shredding on your guitar for a while now and you’re starting to notice some issues with the setup. No worries, it happens to the best of us. Time to assess the current state of your trusty axe!
First things first, let’s take a look at the action of your guitar. Is it too high, making it a real effort to press down those strings? Or maybe it’s too low, causing some annoying buzzing? Adjusting the action can make a world of difference in how your guitar feels to play.
Next up, check out the intonation. Are your open strings perfectly in tune but as you move up the neck, things start to go awry? Time to tweak those saddles and get everything in perfect harmony!
Lastly, give your frets a check. Are there any that are uneven or worn down? A little fret dressing could be just what the doctor ordered to get your guitar playing like a dream again.

Adjusting the Truss Rod for Perfect Neck Relief
So you think your neck needs a little relief, eh? Well, fear not my fellow guitarist! Adjusting the truss rod is not as intimidating as it sounds. In fact, it’s as easy as eating a slice of pie…if the pie was made of guitar strings and frets, that is.
First things first, grab that trusty Allen wrench and locate the truss rod adjustment nut on your guitar. It’s usually located either at the headstock or inside the sound hole. Now, gently give it a twist to the right to tighten or to the left to loosen. Just like turning the volume up on your imaginary air guitar!
Remember that a little goes a long way when it comes to adjusting the truss rod. **Don’t overdo it!** Give it a little tweak, check the neck relief, and adjust accordingly. And if things go south, just remember that the joy of playing music is more important than fretting over a little adjustment mishap. Keep calm and play on!

Setting Up the String Action for Optimal Playability
Are you tired of your guitar strings feeling like razor wire digging into your fingers? Fear not, for we have the solution to your discomfort! Properly setting up the string action on your guitar is the key to achieving optimal playability.
First things first, you’ll need to grab some tools for the job. You’ll need a trusty allen wrench to adjust the height of the strings, a ruler to measure the string action, and a dash of patience because this process might take some trial and error to get it just right.
Now, let’s dive into the nitty-gritty of adjusting the string action. Loosen the strings a bit so you can make adjustments without causing any damage. Use your allen wrench to tweak the saddle height until it’s just right. Remember, you want the strings to be close enough to the fretboard for easy playing, but not so low that they buzz like a pack of angry bees.
Once you’ve got the string action dialed in, it’s time to put your patience to the test. Grab your ruler and measure the string height at various points along the neck. Make small adjustments as needed until you achieve that sweet spot of playability. And voila! You’re now ready to shred like never before!

Fine-Tuning the Intonation for Accurate Pitch
So you’ve mastered playing the melody on your instrument, but something just doesn’t sound quite right? It’s time to fine-tune your intonation for accurate pitch! Here are some tips to help you hit those notes spot on:
First, make sure your instrument is properly tuned. Use a tuner to ensure each string or key is at the correct pitch. Trust me, you don’t want to be the one at band practice playing a C when everyone else is on a D.
Next, pay attention to your finger placement. Are you pressing down too hard on the strings, causing the pitch to be sharp? Or maybe you’re not pressing down hard enough, resulting in a flat note. Play around with the pressure until you find that sweet spot.
Don’t forget to listen to the rest of the ensemble. If you notice that you’re consistently sharp or flat compared to the others, it’s time to make some adjustments. Maybe you need to adjust your embouchure or finger positioning. Whatever it takes to blend in with the group!
Examining and Adjusting the Pickups for Ideal Sound
After years of neglect, it’s finally time to give your pickup truck some much-needed TLC. While you may think a simple wash and wax will do the trick, the real key to unlocking its potential lies in . But fear not, fellow truck enthusiasts, for we are here to guide you through this exhilarating journey.
First things first, grab your trusty toolbox and let’s get down to business. Start by carefully inspecting each pickup for any signs of wear and tear. Ensure that the connections are secure and free from any pesky dirt or grime that may be dampening your truck’s performance. Remember, a happy pickup equals a happy truck.
Next, it’s time to fine-tune those pickups to perfection. Use a screwdriver to adjust the height and angle of each pickup until you find that sweet spot where the sound truly sings. Experiment with different settings until you strike gold, and don’t be afraid to get a little fancy with it. After all, your truck deserves nothing but the best.
And finally, don’t forget to test out your handiwork. Crank up the volume, hit the open road, and revel in the symphony of sounds emanating from your newly-tuned pickups. Feel the power coursing through your veins as you bask in the glory of a job well done. So go forth, dear truck aficionados, and let those pickups roar like never before!
Caring for Your Guitar Post-Setup: Maintenance Tips and Tricks
So you’ve just had your guitar set up by a pro and it’s playing like a dream. Don’t let all that hard work go to waste! Here are some maintenance tips and tricks to keep your guitar in tip-top shape:
- Clean your fretboard regularly: A dirty fretboard not only looks gross, but it can also affect the playability of your guitar. Use a soft cloth to wipe down the fretboard and remove any dirt or grime. Be sure to use the appropriate fretboard cleaner for the type of wood on your guitar.
- Keep your guitar hydrated: Just like us, guitars need to stay hydrated. Use a humidifier to keep the wood from drying out and cracking. You don’t want your guitar to turn into a sad, shriveled up raisin, do you?
- Check your tuning regularly: Your guitar may be perfectly tuned after a setup, but changes in temperature and humidity can throw it off. Make sure to check your tuning regularly and make adjustments as needed. Your guitar will thank you.
Remember, taking care of your guitar is like taking care of a pet. You wouldn’t neglect your furry friend, would you? So show your guitar some love and give it the maintenance it deserves. With a little bit of TLC, your guitar will continue to rock out for years to come!
FAQs
Can I use a banana as a substitute for a capo?
Well, technically you could, but we wouldn’t recommend it. Capos are designed to press the strings down evenly across the fretboard, while a banana might not provide the same level of precision. Plus, it might get a little messy.
Do I really need to adjust the truss rod?
Only if you want your guitar to sound like a harmonious angel sent from above. The truss rod helps control the curvature of the neck, which affects the action and playability of your guitar. So, unless you prefer your strings to sound like a symphony of cats in heat, adjusting the truss rod is definitely recommended.
Is it okay to use a power drill when setting up my guitar?
Sure, if you want to turn your beloved instrument into a Swiss cheese masterpiece. A power drill may be a bit of an overkill for a delicate operation like setting up a guitar. Stick to the traditional tools like screwdrivers and wrenches to avoid any accidental rock and roll surgery.
Can I skip cleaning my guitar before setting it up?
Do you enjoy playing a crusty, dusty, sound-muffled mess of an instrument? If not, then we highly recommend cleaning your guitar before diving into the setup process. A clean guitar not only looks better but also sounds better and will make the setup process smoother and more enjoyable.
Should I wear a cape while setting up my guitar for added superhero vibes?
Absolutely! Every guitar setup guru needs a cape to channel their inner rock god powers. Just be careful not to get it caught in the tuning pegs while unleashing your musical prowess. Safety first, capes second.
Strum on, DIYers!
As you embark on your journey to becoming a guitar setup master, remember that practice makes perfect. Don’t get discouraged if your first attempt doesn’t result in the perfect setup – even rock stars have off days! Keep tinkering, keep strumming, and remember that the true joy of DIY is in the process, not just the end result. So grab your tools, tune up that guitar, and get ready to rock out like never before. Happy playing!
