
Strap in, folks, because we’re about to embark on a musical journey that will have your fingers flying across those frets like never before. That’s right, we’re diving into the world of guitar setup and action adjustment – because let’s face it, no one wants to be stuck with a guitar that plays as smoothly as a rusty door hinge. So grab your tuning fork and brace yourself for a crash course in achieving the ultimate playability because, trust us, you’re gonna want to be in tune with this one.
Contents
- 1 Understanding the Basics of Guitar Action and Its Importance
- 2 Exploring the Tools You’ll Need for Action Adjustment
- 3 Step-by-Step Guide to Adjusting String Height for Optimal Playability
- 4 How Truss Rod Adjustments Can Improve Your Guitar’s Action
- 5 Balancing Intonation and Action for a Perfect Setup
- 6 Common Mistakes to Avoid When Adjusting Guitar Action
- 7 Maintaining Your Setup for Long-Term Instrument Health and Performance
- 8 FAQs
- 9 In Conclusion: Rock On!
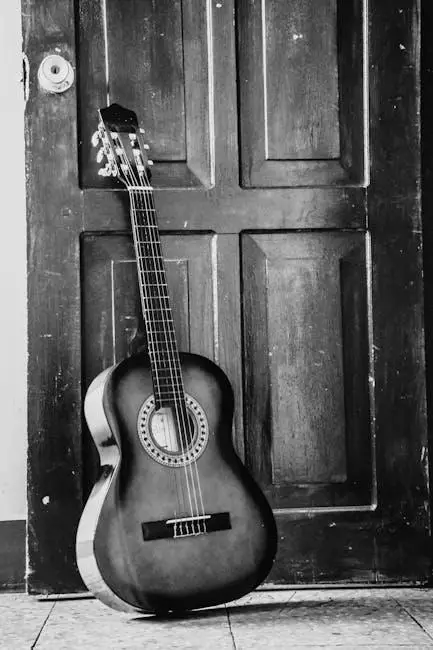
Understanding the Basics of Guitar Action and Its Importance
So you’ve finally picked up a guitar and are ready to rock out like a superstar. But before you start shredding those epic riffs, it’s important to understand the basics of guitar action and why it’s crucial.
What is guitar action?
- Guitar action refers to the height of the strings above the fretboard.
- Low action means the strings are closer to the fretboard, making it easier to play but risking buzzing sounds.
- High action means the strings are further from the fretboard, making it harder to play but reducing the chance of buzzing.
Why is guitar action important?
- Proper guitar action can affect the playability, tone, and intonation of your instrument.
- Low action can make it easier to play fast and expressively, while high action can make it easier to bend notes and produce a fuller sound.
- Having the right balance of action is crucial for a comfortable playing experience and to ensure your guitar sounds its best.
So the next time you pick up your guitar, take a moment to check and adjust the action. Your fingers and your ears will thank you for it!

Exploring the Tools You’ll Need for Action Adjustment
One of the most essential tools for adjusting your actions is a good old-fashioned wrench. It’s like a trusty sidekick, always there to help tighten things up or loosen them when necessary. Think of it as the Batman to your Robin, the peanut butter to your jelly, the yin to your yang. Without a good wrench by your side, you might as well be trying to adjust your actions with a toothpick – it’s just not gonna cut it.
Another tool you’ll need in your action adjustment arsenal is a screwdriver. Not just any screwdriver, mind you, but one that can handle all the different types of screws you’ll encounter. Phillips head, flathead, hex, torx – you name it, you’ll need a screwdriver that can handle them all. It’s like the Swiss Army knife of tools, versatile and always ready to tackle whatever screw comes your way.
Don’t forget about a trusty pair of pliers, too. These babies are like the multitasking wizards of the tool world. Need to grip something tightly? Pliers. Need to cut a wire? Pliers. Need to twist something into place? You guessed it – pliers. Plus, the more colorful and funky-looking they are, the better – who says tools can’t have a little flair?
Last but not least, a good ol’ hammer can really come in handy when it comes to adjusting your actions. Sometimes you just need to give things a good whack to get them back on track. It’s like the final boss of tools – when all else fails, bring in the hammer and show that action who’s boss.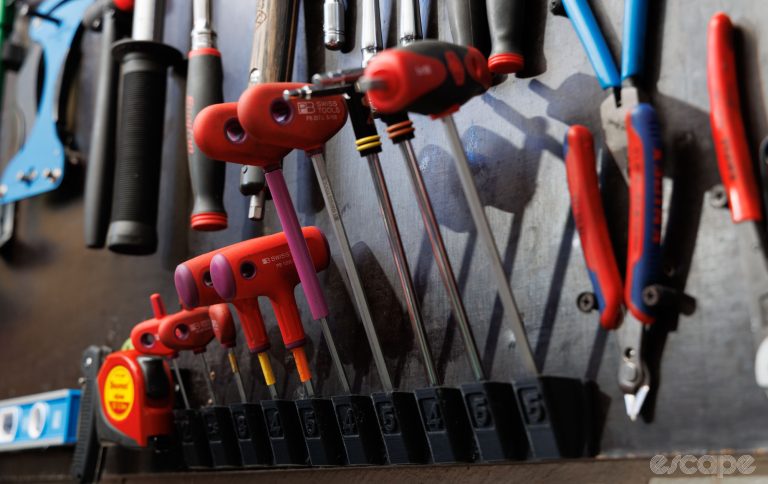
Step-by-Step Guide to Adjusting String Height for Optimal Playability
So you’ve got a guitar with strings so high that you feel like you’re playing a harp from the Middle Ages. Fear not, fellow musician! With a few tweaks here and there, you can bring those strings down to a comfortable height for optimal playability.
First things first, grab yourself an Allen wrench and locate the truss rod at the base of your guitar’s neck. This little rod is going to be your best friend in this string-height adjusting adventure.
Next, loosen those strings a bit. Think of it as giving your guitar a little breathing room. Once the tension is reduced, you can start making adjustments to the truss rod. Remember, small turns make big differences, so take it slow and steady.
After you’ve made your truss rod adjustments, it’s time to move on to the saddle. Use that same Allen wrench to raise or lower the saddle to your desired height. And voila! You’ve now transformed your medieval harp into a sleek, easy-to-play guitar. Get ready to rock out like never before!

How Truss Rod Adjustments Can Improve Your Guitar’s Action
So, you want to improve your guitar’s action, huh? Well, look no further than the magical world of truss rod adjustments! With just a few simple tweaks, you can transform your playability from meh to marvelous. It’s like giving your guitar a well-deserved spa day.
First things first, you’re going to need the right tools for the job. Grab yourself a trusty allen wrench and get ready to dive into the inner workings of your beloved instrument. Don’t worry, it’s not as scary as it sounds – think of it as giving your guitar a little tune-up.
Now, onto the nitty gritty. Loosen that truss rod just a smidge and watch as your strings magically get closer to the fretboard. It’s like your guitar is giving you a big, thankful hug. Tighten it up a bit and suddenly your action is so low, you’ll feel like you’re playing butter. It’s like your fingers are gliding on a cloud of pure musical bliss.
So, what are you waiting for? Get that allen wrench out and start tinkering. Your guitar will thank you, your fingers will thank you, and your audience will thank you. Truss rod adjustments – turning mediocre into magnificent, one quarter turn at a time.
Balancing Intonation and Action for a Perfect Setup
So, you’ve finally decided to tackle the daunting task of balancing intonation and action on your guitar for that perfect setup. Congratulations, you brave soul! It’s not for the faint of heart, but fear not, with a little bit of patience and a whole lot of determination, you’ll soon be on your way to guitar nirvana.
First things first, let’s talk about intonation. Ah, intonation, the bane of every guitarist’s existence. It’s like trying to tame a wild beast – slightly terrifying, but oh so satisfying when you finally get it right. Remember, the goal here is to make sure that every note you play is in tune all the way up and down the neck. No pressure, right?
Next up, action. No, we’re not talking about the latest James Bond flick – we’re talking about the height of your strings above the fretboard. Too high, and you’ll be playing like you’re trying to strum a fence post. Too low, and you’ll be hearing that dreaded buzz that no guitarist ever wants to hear. Finding that perfect balance is key, my friend.
So, grab your tools, take a deep breath, and dive headfirst into the world of intonation and action. Remember, it’s all part of the journey to becoming a guitar wizard. And who knows, maybe one day you’ll look back on this moment with a smile, thinking, “I conquered that beast, and my guitar never sounded better.”
Common Mistakes to Avoid When Adjusting Guitar Action
So you’ve decided it’s time to adjust the action on your guitar, huh? Well, before you dive in headfirst, make sure you steer clear of these common mistakes that could leave your precious instrument sounding more like a dying cat than a rockstar’s dream.
First and foremost, do not attempt to adjust the action without the proper tools. This isn’t a job for a butter knife and a hammer, folks. Invest in a good set of hex keys and a capo to ensure you can make precise adjustments without causing any unnecessary damage.
Another big no-no is rushing through the process. Adjusting your guitar’s action takes time and patience, much like trying to tune out your annoying neighbor’s terrible karaoke sessions. Take your time, make small adjustments, and test the playability along the way.
Lastly, don’t forget to check and double-check your measurements. Just like eyeballing the distance from the edge of the cliff before you base jump, eyeballing the action height will likely lead to disaster. Use a ruler or feeler gauge to ensure your strings are perfectly set for optimal playability.
Maintaining Your Setup for Long-Term Instrument Health and Performance
So you’ve finally got your instrument setup just the way you like it. But how do you make sure it stays that way for the long haul? Here are some tips to help you maintain your setup for long-term instrument health and performance:
First off, **keep it clean**! Dust and dirt can build up on your instrument and affect its sound quality. Use a soft cloth to wipe down your instrument regularly and keep it looking shiny and new. You can also use a small brush to clean hard-to-reach areas like the tuning pegs or bridge.
Next, **watch out for changes in temperature and humidity**. Extreme fluctuations can cause your instrument to expand or contract, leading to problems like cracking or warping. Invest in a humidifier or dehumidifier to keep your instrument in the optimal environment.
**Regularly check for any signs of wear and tear**. Look out for loose screws, cracks, or any other damage that could affect your instrument’s performance. It’s better to catch these issues early on before they escalate into bigger problems.
FAQs
Why is it important to master guitar setup?
Because if your guitar setup is off, you might as well be thrashing a piece of driftwood with strings attached. Playability is key to sounding like a rock god or a folk hero.
What is action adjustment and how does it affect playability?
Action adjustment is like giving your guitar a spa day. It’s all about tweaking the height of the strings to find that sweet spot where your fingers glide effortlessly over the fretboard.
How can I tell if my guitar’s action needs adjusting?
Well, if your fingers feel like they’re running a marathon every time you play a riff, it might be time to check your action. Or, if your strings are so high you could use them to pick locks, then you definitely need an adjustment.
Can I adjust the action on my guitar myself or should I leave it to the pros?
Sure, you can try to DIY it, but unless you’ve got the steady hands of a brain surgeon and the patience of a saint, you might want to leave it to the experts. It’s better to have a pro fine-tune your action than risk turning your guitar into a glorified paperweight.
How often should I check and adjust the action on my guitar?
Like your favorite pair of jeans, you’ll know when it’s time for a little adjustment. If you start feeling like your guitar is fighting back every time you play, then it’s probably time to give it some TLC. And hey, a little maintenance never hurt anyone!
In Conclusion: Rock On!
So there you have it, folks! Mastering the art of guitar setup is the key to achieving optimal playability and rocking out like a true guitar hero. With the right action adjustment, you can shred with ease and finesse, making your guitar sing with every chord and riff. So go forth, fellow guitar enthusiasts, and may your setup skills be as sharp as your solos! Keep on strumming, keep on adjusting, and most importantly, keep on rocking on!
